With Serverless, it's easier than ever to deploy production-ready API endpoints. However, using AWS API Gateway results in odd hostnames for your endpoints. Further, these hostnames will change if you remove and redeploy your service, which can cause problems for existing clients.
In this guide, I'll show you how to map a custom domain name to your endpoints.
This post is the first in a two-part series. Check out the next post to configure multiple Serverless services on the same domain name for maximum microservice awesomeness.
Before you start
To get started, you'll need the Serverless Framework installed.
You should also have your desired domain name registered through AWS. Read the documentation on that here.
Getting a certificate for your domain
The steps below walk through setting up a certificate for your domain. If you already have a certificate issued, skip to the next section.
API Gateway requests must be served over HTTPS, so you need to get an SSL/TLS certificate. You may manually upload your certificate to Amazon, but I find it easier to use AWS Certificate Manager to handle my certificates. Best of all, it's free!
To set up the certificate:
First, make sure you have the domain name in your Registered Domains in Route 53.
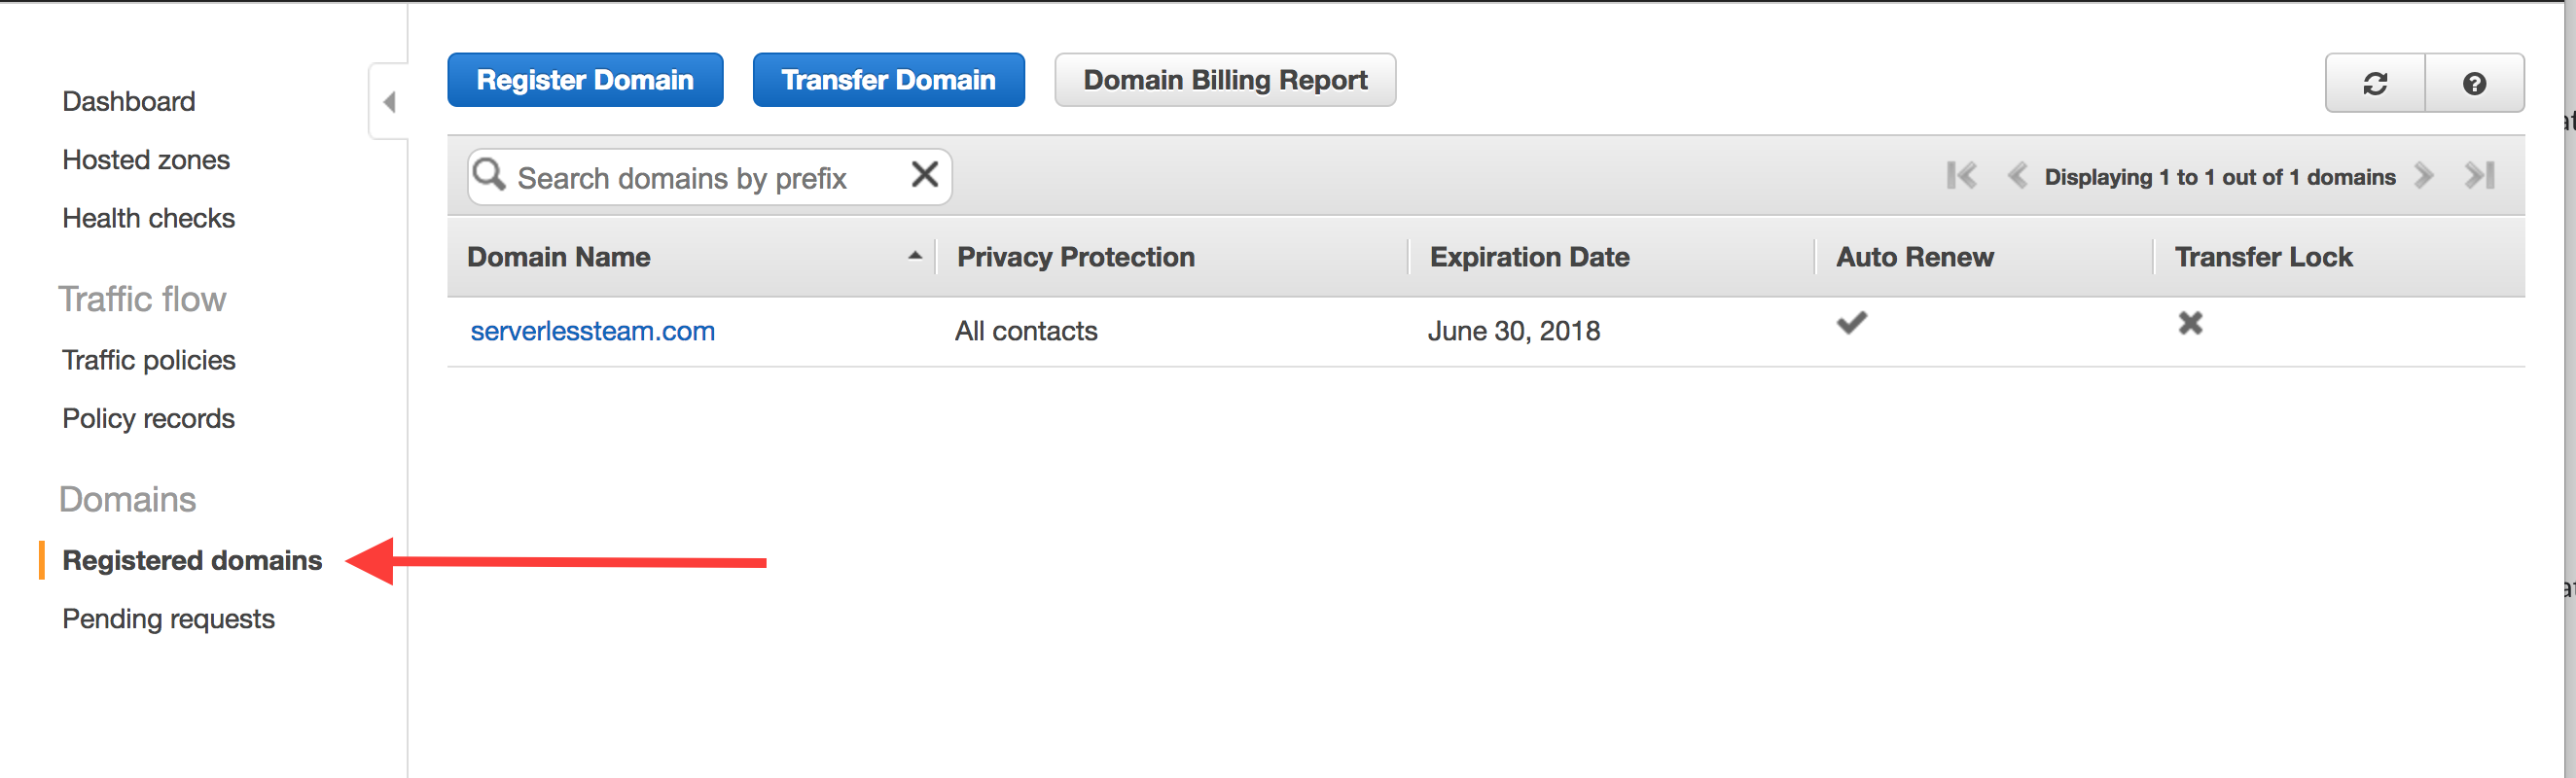
If you have a domain that's registered with a different registrar, you can transfer registration to Route 53. If you don't have a domain yet, you can purchase one through Route 53.
Once you have your domain, request a new certificate with the AWS Certificate Manager. Note that you'll need to be in region us-east-1. This is the only region that works with API Gateway.

Add the domain name you want, then hit Review and Request. After you confirm, it will say that a confirmation email has been sent to the registered owner of the domain to confirm the certificate. At this point, the certificate will be in a "Pending validation" status.
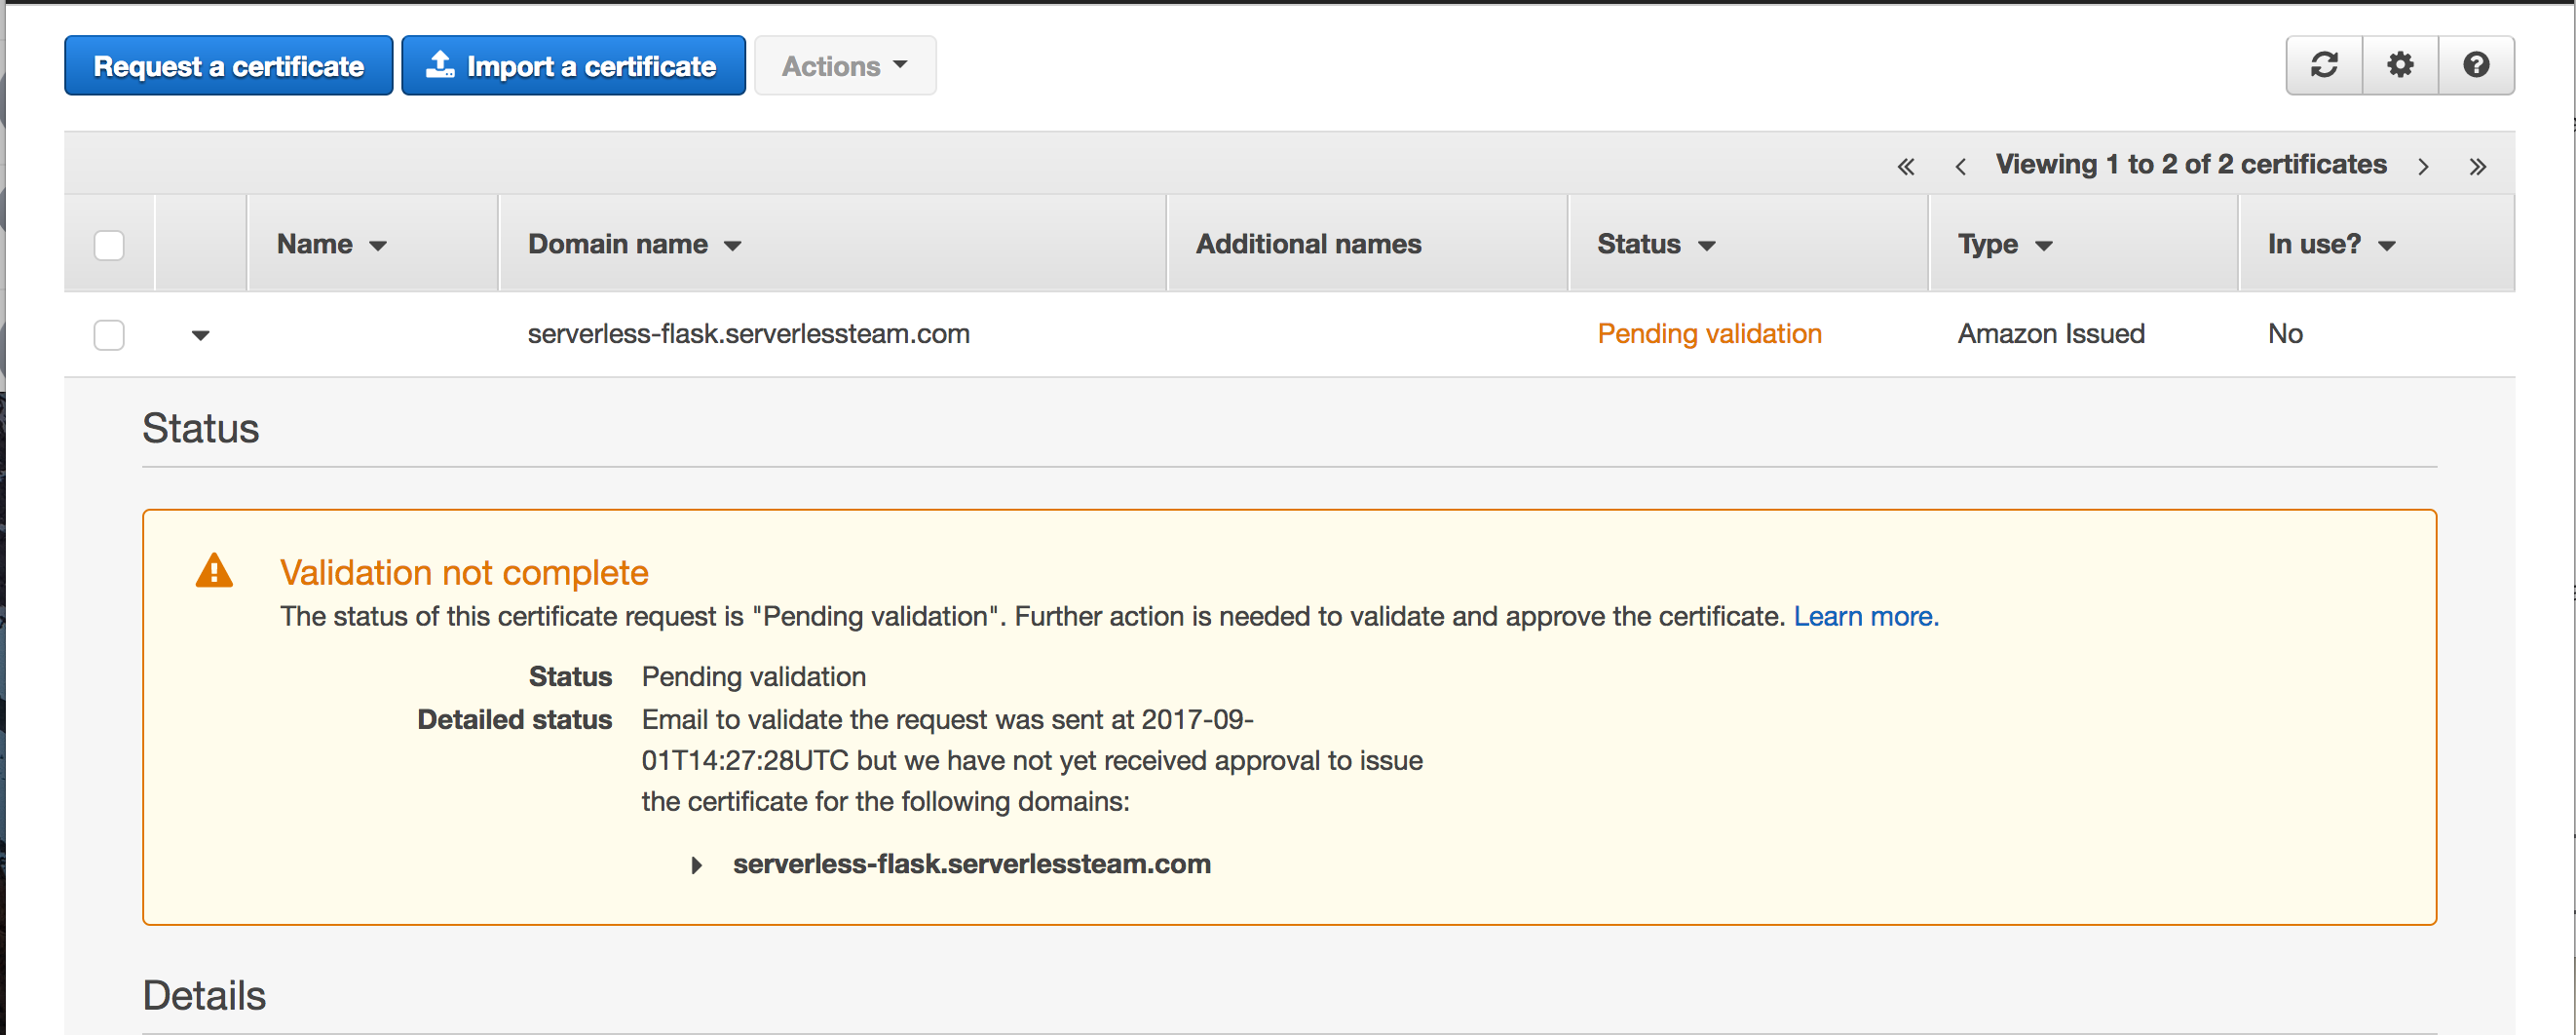
The registered owner of your domain will get a confirmation email from AWS. Click the link in the email to confirm issuance of the certificate. Once you do that, the certificate will change to an "Issued" status.

Your certificate is ready to go! Move on to the next step to create a custom domain in API Gateway.
Create your serverless backend
Before you go any further, you should have a Serverless service with at least one function that has an HTTP event trigger. If you don't have that, you can use the code below. This example is in Python, but any runtime will work.
In a clean directory, add a handler.py file with the following contents:
# handler.py

def hello(event, context):
    response = {
        "statusCode": 200,
        "body": 'Hello, world!'
    }

    return response

def goodbye(event, context):
    response = {
        "statusCode": 200,
        "body": 'Goodbye, world!'
    }

    return response
We've created two simple functions, hello and goodbye, to demonstrate how to write HTTP handlers in Serverless. Now, let's connect them with a Serverless service. Create a serverless.yml file with the following contents:
# serverless.yml

service: serverless-http

provider:
  name: aws
  runtime: python3.6

functions:
  hello:
    handler: handler.hello
    events:
      - http:
          path: hello
          method: get
  goodbye:
    handler: handler.goodbye
    events:
      - http:
          path: goodbye
          method: get
This serverless.yml file configures the functions to respond to HTTP requests. It says that the hello function will be triggered on the /hello path of your API Gateway, while the goodbye function will be triggered on the /goodbye path.
Run sls deploy to send your function to production:
$ sls deploy

Service Information
service: serverless-http
stage: dev
region: us-east-1
stack: serverless-http-dev
api keys:
  None
endpoints:
  GET - https://4aan6avk54.execute-api.us-east-1.amazonaws.com/dev/hello
  GET - https://4aan6avk54.execute-api.us-east-1.amazonaws.com/dev/goodbye
functions:
  hello: serverless-http-dev-hello
  goodbye: serverless-http-dev-goodbye
Once the deploy is finished, you will see the Service Information output. This includes the API Gateway domain where you can trigger your functions. In the example above, my hello function is available at https://4aan6avk54.execute-api.us-east-1.amazonaws.com/dev/hello. I can visit that in my browser:
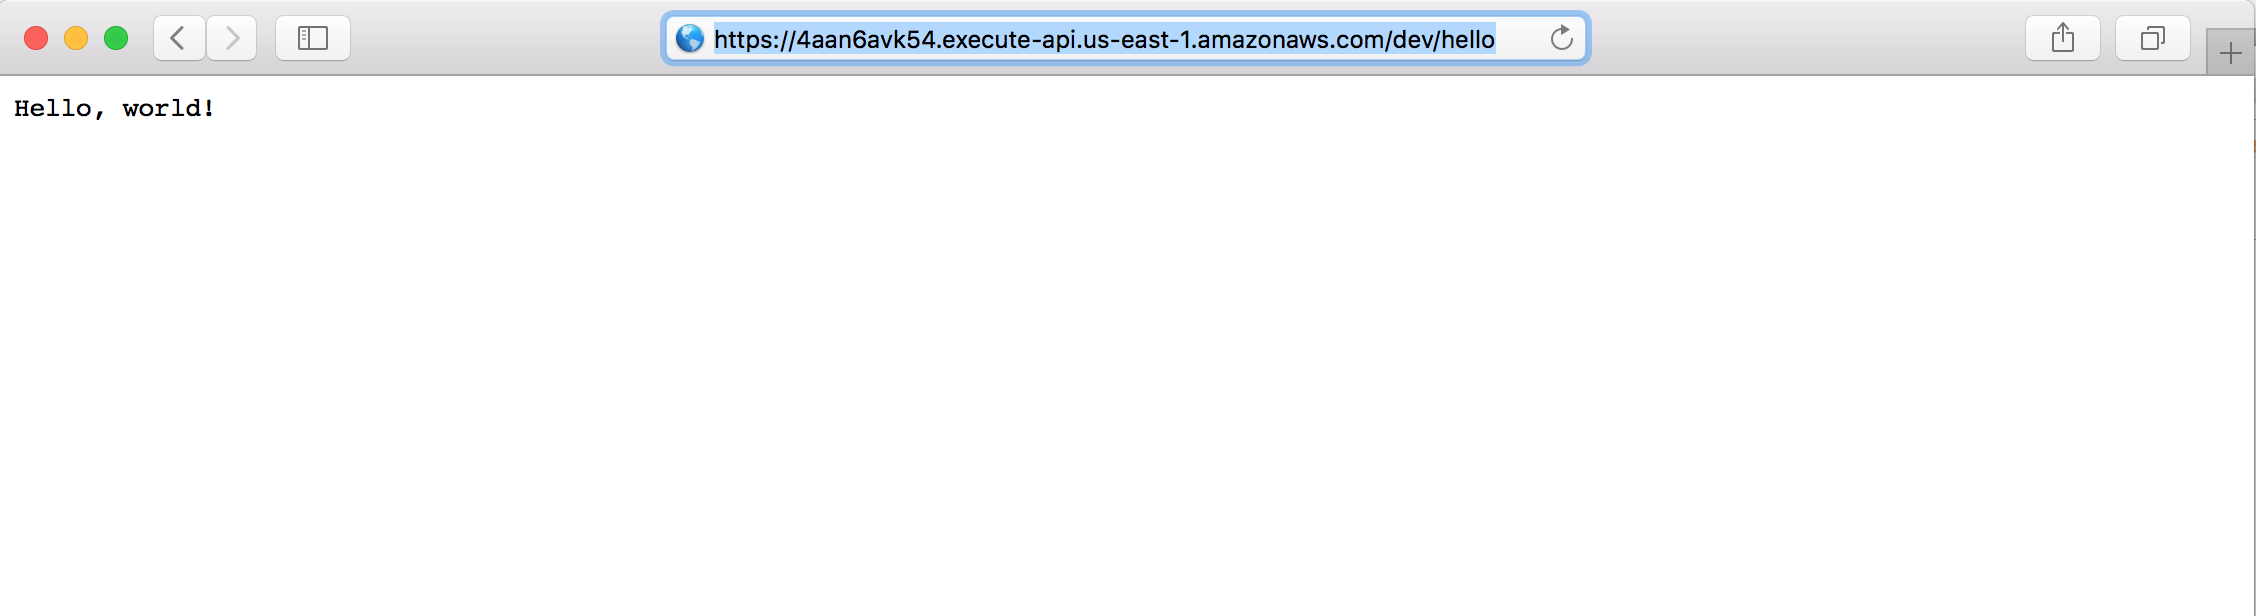
and I get my Hello, world! response. If I change to the /goodbye endpoint, I'll get the Goodbye, world! response.
It's nice how easy this is to get a production API endpoint, but this still isn't ideal. My domain is impossible to remember (4aan6avk54.execute-api.us-east-1.amazonaws.com). Plus, if I ever remove my service and then redeploy, I'll get a new random domain.
Finally, the path is odd as well -- /dev/hello includes my stage as well as my actual page. I'd rather have a cleaner path. This shows the need for using a custom domain.
Create a custom domain in API Gateway
By this point, you should have an issued certificate and a Serverless service with an HTTP event configured. Now you need to create a custom domain in API Gateway that you can use with your deployed gateways.
The easiest way to do this with Serverless is with the serverless-domain-manager plugin. Big thanks to the people at Amplify Education for developing this plugin.
To use the plugin, first make sure you have a package.json file in your service. Run npm init -y to generate one.
Then, you'll need to install the plugin in your service:
$ npm install serverless-domain-manager --save-dev
Then, configure it into your serverless.yml:
plugins:
  - serverless-domain-manager

custom:
  customDomain:
    domainName: <registered_domain_name>
    basePath: ''
    stage: ${self:provider.stage}
    createRoute53Record: true
Make sure you replace the domainName value with the domain name that you've configured your certificate for. If you're using a certificate that doesn't exactly match your domain name, such as a wildcard certificate, you'll need to specify the certificate name with a certificateName property under customDomain.
Once this is ready, you can create your custom domain with a single command:
$ sls create_domain
Serverless: Domain was created, may take up to 40 mins to be initialized
As the output notes, it can take up to 40 minutes for your domain to be ready. This is how long it takes AWS to provision a CloudFront distribution. In my experience, it generally takes 10-20 minutes.
Once your domain name is ready, run sls deploy again to redeploy your service:
$ sls deploy

Service Information
service: serverless-http
stage: dev
region: us-east-1
stack: serverless-http-dev
api keys:
  None
endpoints:
  GET - https://4aan6avk54.execute-api.us-east-1.amazonaws.com/dev/hello
  GET - https://4aan6avk54.execute-api.us-east-1.amazonaws.com/dev/goodbye
functions:
  hello: serverless-http-dev-hello
  goodbye: serverless-http-dev-goodbye

Serverless Domain Manager Summary
Domain Name
  mysubdomain.serverless.com
Distribution Domain Name
  a2fcnefljuq1t1.cloudfront.net
At the end of the Service Information block, you'll also get a Serverless Domain Manager Summary that shows the domain name associated with your domain. Now you can visit that domain in your browser with the cleaner path that you've assigned to your functions:
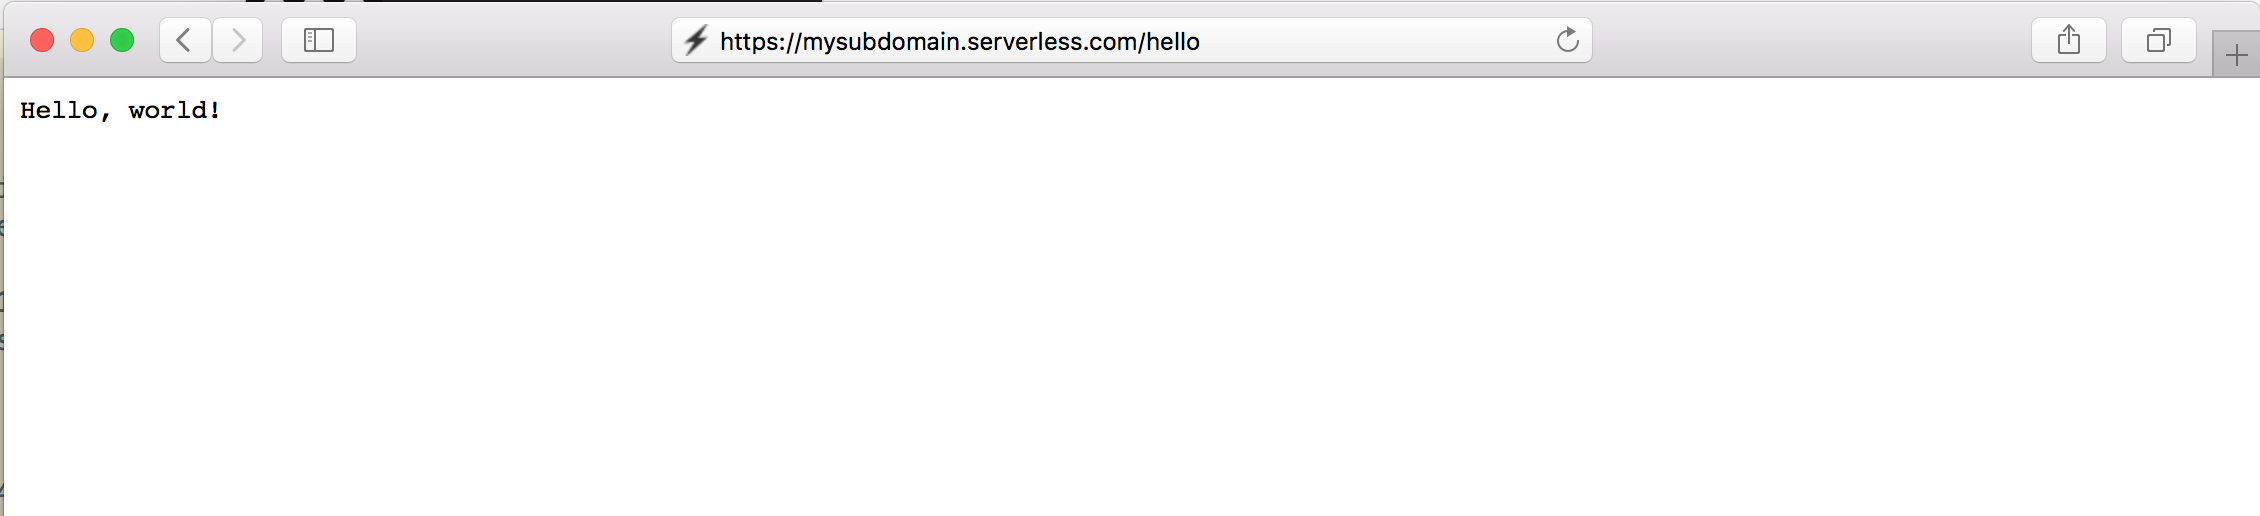
Voila! You have a much cleaner URL for your endpoints.
If you want to put multiple services on the same domain, be sure to check out the follow up post!