
Overview
Building an Alexa skill really isn’t so hard! And it’s even easier if you use the Serverless Framework along with the Bespoken Plugin.
To show you how, we’re going to take you through the steps of building your very own Alexa skill, by making a simple guessing game. The game will pull some images from Giphy, then ask users to guess which search term generated those images.
In this walkthrough, we will:
- Set up an initial project for an Alexa skill
- Get started using the Alexa Node.js SDK
- Test and debug locally with the Bespoken plugin for Serverless
- Deploy the skill to AWS Lambda using Serverless
- Talk about advanced steps and further exploration
Setting up the environment
For starters, you’ll need a few things:
- An Amazon developer account (sign up here)
- An AWS account with access to Lambda and DynamoDB (learn how to create your AWS account with IAM roles here)
- The Serverless Framework (
npm install serverless -g)
Go ahead and get set up with those items if you have not already.
Now, to follow along at home, start by cloning this repo with Alexa sample code:
git clone https://github.com/bespoken/giftionary
This repository contains the example we are going to walk through, already configured with the correct packages and libraries. This includes the Alexa Node.js SDK from Amazon that we’ll leverage for building a skill.
Once you’ve cloned the repository, go to the directory you cloned it into and run npm install to setup the project.
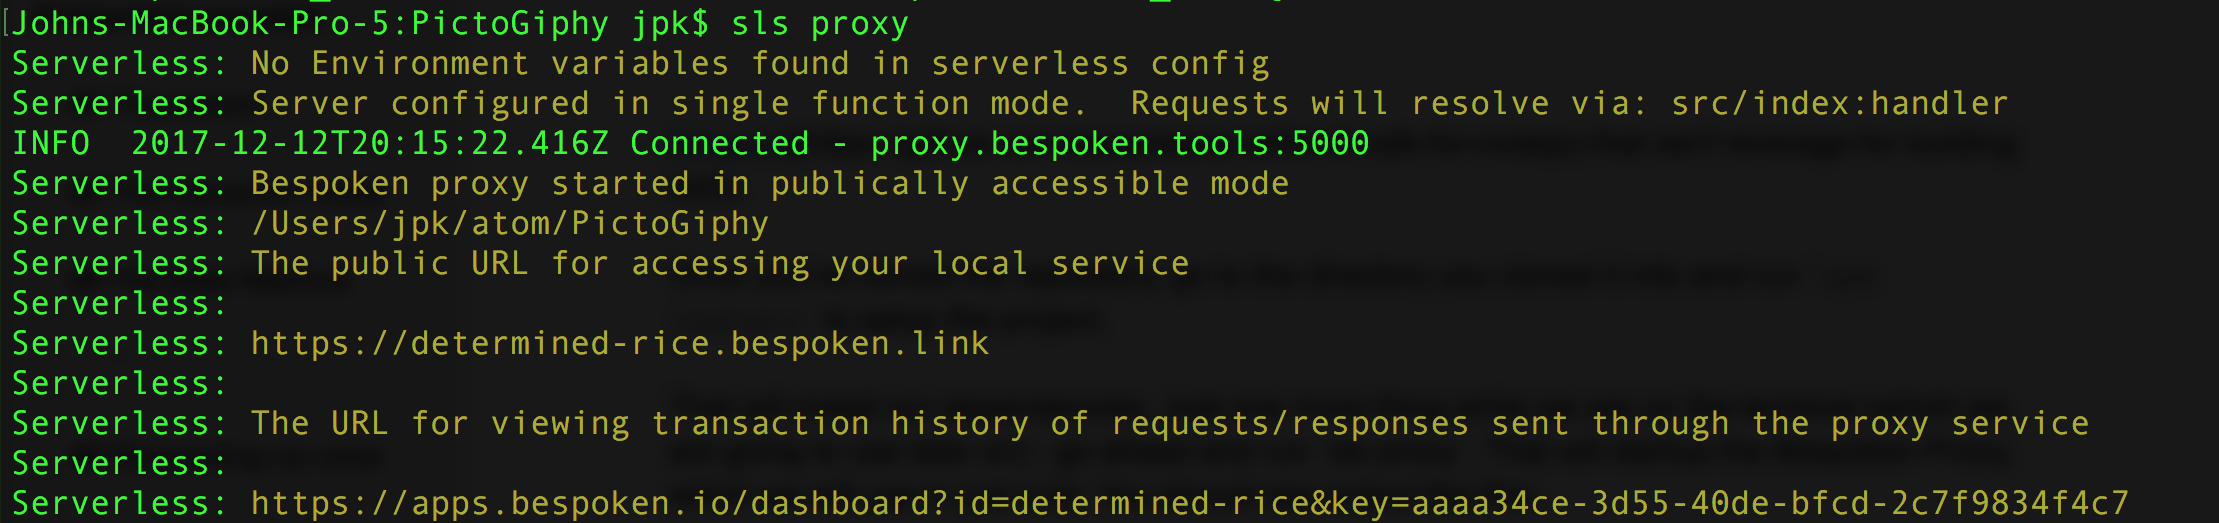
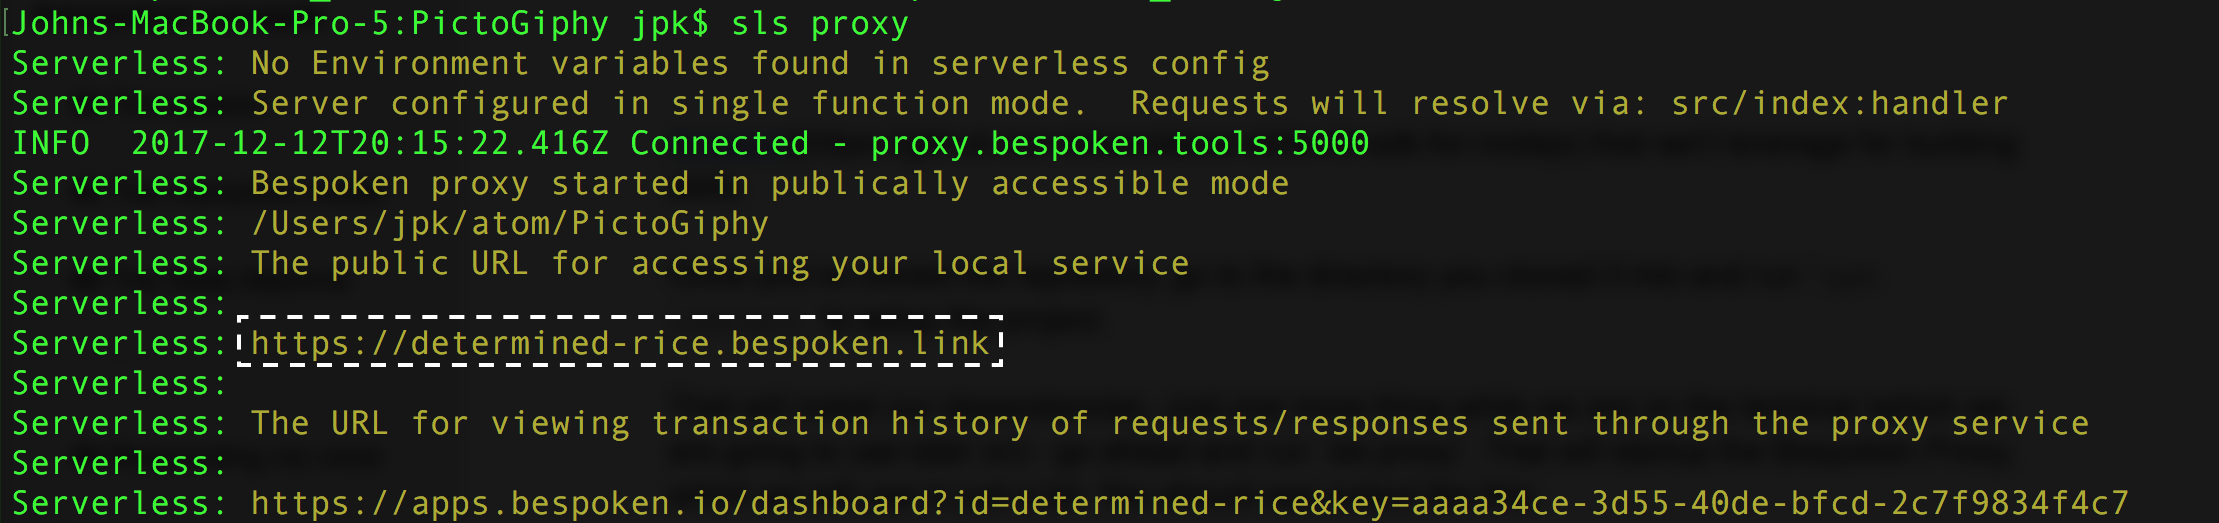
That will install our dependencies. Just one more thing—while we are in the terminal, go ahead and run sls proxy. That will start the Bespoken Proxy, which we will use in just a bit.
You should see output like this if everything is working correctly:
We’re now ready to start development!
Important concepts
Before we jump in though, there are three very important concepts we want to review. We will cover each in detail as we go along:
- Session - a conversation with a skill
- Intents and the Interaction Model - the user interface for the skill
- State Machine - the programming pattern the Node.js SDK is built on
If you feel like you understand sessions and interaction models pretty well, feel free to jump straight down to State Machine, which is where we begin creating our first skill response.
The session
A session is a conversation between a user and our skill. It starts when the user invokes the skill by saying something like “Alexa, open giftionary”.
The session remains active as long as the user continues interacting with the skill. This interaction can end for three reasons:
- The user explicitly ends it (by saying something like “quit”)
- The session times out (due to the user not responding to a prompt or question from the skill)
- The skill explicitly ends itself (because it has completed its work)
As long as our skill is in session, it has the chance to share information with the user via voice and visual elements, and/or ask the user questions. In thinking about voice design, it’s important to keep in mind how to keep the user engaged and keep the session alive so that the skill can do its job.
Intents and the interaction model
Another very important aspect to understand with Alexa skills are intents and the interaction model.
Think of the interaction model as the UI for the skill—only in this case, it’s not a visual interface, but a vocal one. Our interaction model describes: What the user can say (utterances) What intentions these utterances map to (intents)
Intents are essential to the interaction model and Alexa, and to voice- and AI-based programming in general.
For example, a user could say any one of the following: “Help me,” “Help,” or “What is this?” Alexa will interpret all of these as being the Help intent. This directly affects which pieces of your code will run.
Here’s a sample of our interaction model - from the speechAssets/IntentSchema.json:
{
 "intent": "Play"
}
And from speechAssets/SampleUtterances.txt:
Play get started
Play play
Play play a game
This is our Play intent. You can see that we have multiple sample utterances defined for it—“play,” “get started,” and “play a game”. All of these show up as the Play intent, which in our code triggers a game to start.
Easy, right?
Below is another intent, this time containing a slot.
Slots are like variables. An intent with a slot—rather than just matching what the user says to one of the sample utterances—will treat the slot as a wildcard. It will pass the value for that wildcard to our code:
From IntentSchema.json:
{
 "intent": "Guess",
 "slots": [
   {"name": "Term", "type": "Term"}
 ]
}
From SampleUtterances.txt:
Guess is it {Term}
Guess {Term}
In this case, our slot captures the user’s guesses. Since our search terms are an enumerated set, we provide the list of values possible in speechAssets/TermsSlot.txt. The values are things like cat, dog, plane, etc.
Besides being enumerable, slots can also have types, which serve to narrow the values they look for. This helps with speech recognition. Examples of built-in types provided by Amazon are AMAZON.NUMBER and AMAZON.DATE.
Note: You can read more about types here.
The State Machine
The Alexa Node.js SDK encourages the use of a state machine for building skills.
State machines are a natural fit for skills (and other voice-based apps). The basic idea is that your app has states and transitions. Any action a user takes is handled based on the state they are currently in, and part of that handling may include transitioning to another state.
This pattern pushes us to think about the discreet states the user will go through in interacting with our app, and how, for each of these scenarios, we will handle what a user might say. This mindset gets us thinking about providing appropriate, contextualized responses to the user, an important part of voice/conversational interfaces.
To see this in action in our skill, let’s take a look at our state-handlers:
var Alexa = require('alexa-sdk');

// Initial entry point, and checks the signature if necessary
var handler = function(event, context) {
	const alexa = Alexa.handler(event, context);
    alexa.appId = APP_ID;
    // To enable string internationalization (i18n) features, set a resources object.
    // alexa.resources = languageString;
    alexa.registerHandlers(newSessionHandler, // Special handlers for new sessions
        startGameHandler, // Starts the game
        guessHandler, // Handles guesses
        playAgainHandler, // Asks the user to play again at the end
        helpHandler); // Handling for help
    alexa.execute();
}
For the guessing game we’re building, we have the following states:
- New Session
- Start Game
- Guessing
- Play Again
- Help
Here’s how we handle new sessions—the user first interacting with our skill:
"NewSession": function () {
   // Check if this is a new user or not
   let newUser = false;
   if(Object.keys(this.attributes).length === 0) {
       this.attributes["existingUser"] = true;
       newUser = true;
   }

   // If this is a new user, tell them about the game
   // Otherwise, we just start a new game
   if (newUser) {
       this.handler.state = states.HELP_MODE;
       this.emitWithState("AMAZON.HelpIntent", true);
   } else {
       this.handler.state = states.START_MODE;
       this.emitWithState("Play");
   }
}
Whenever a user starts a new session (by saying something like “Alexa, open giftionary”), this method will be called. Our code then checks to see if this is a new user or not.
We leverage the built-in support for DynamoDB that is part of the Node.js SDK for this; user-level data is automatically stored on the attributes property. Additionally, these attributes are passed back and forth to our skill as long as it remains in session, and then persisted to DynamoDB when the session ends.
For new users, we change their state to HELP mode. This explains to them how the game works and asks them if they would like to start playing. For existing users, we skip straight to the PLAY mode.
Responding via voice
Now that we’ve worked through the basics of our state machine, how do we actually reply to the user when the game starts?
Easy! Here is our code that does that:
this.response.speak("Take a look at this image <break time='3s' /> What is the search term for it?")
   .listen("Take another look <break time='3s' /> what search term did we use?")
   .cardRenderer(cardTitle, cardContent, imageObj);
The key thing to look at here is the speak method: “Take a look at this image
And the part in the middle that looks like XML is actually an SSML tag (Speech Synthesis Markup Language). SSML is a very helpful tool for working with voice—it allows us to insert pauses into speech, change the vocal tone, emphasize certain words, or even “bleep” things out.
Feel free to read up a bit on SSML here.
The listen part means that this response is going to wait on the user to respond. If they do not, it will reprompt them with the specified text.
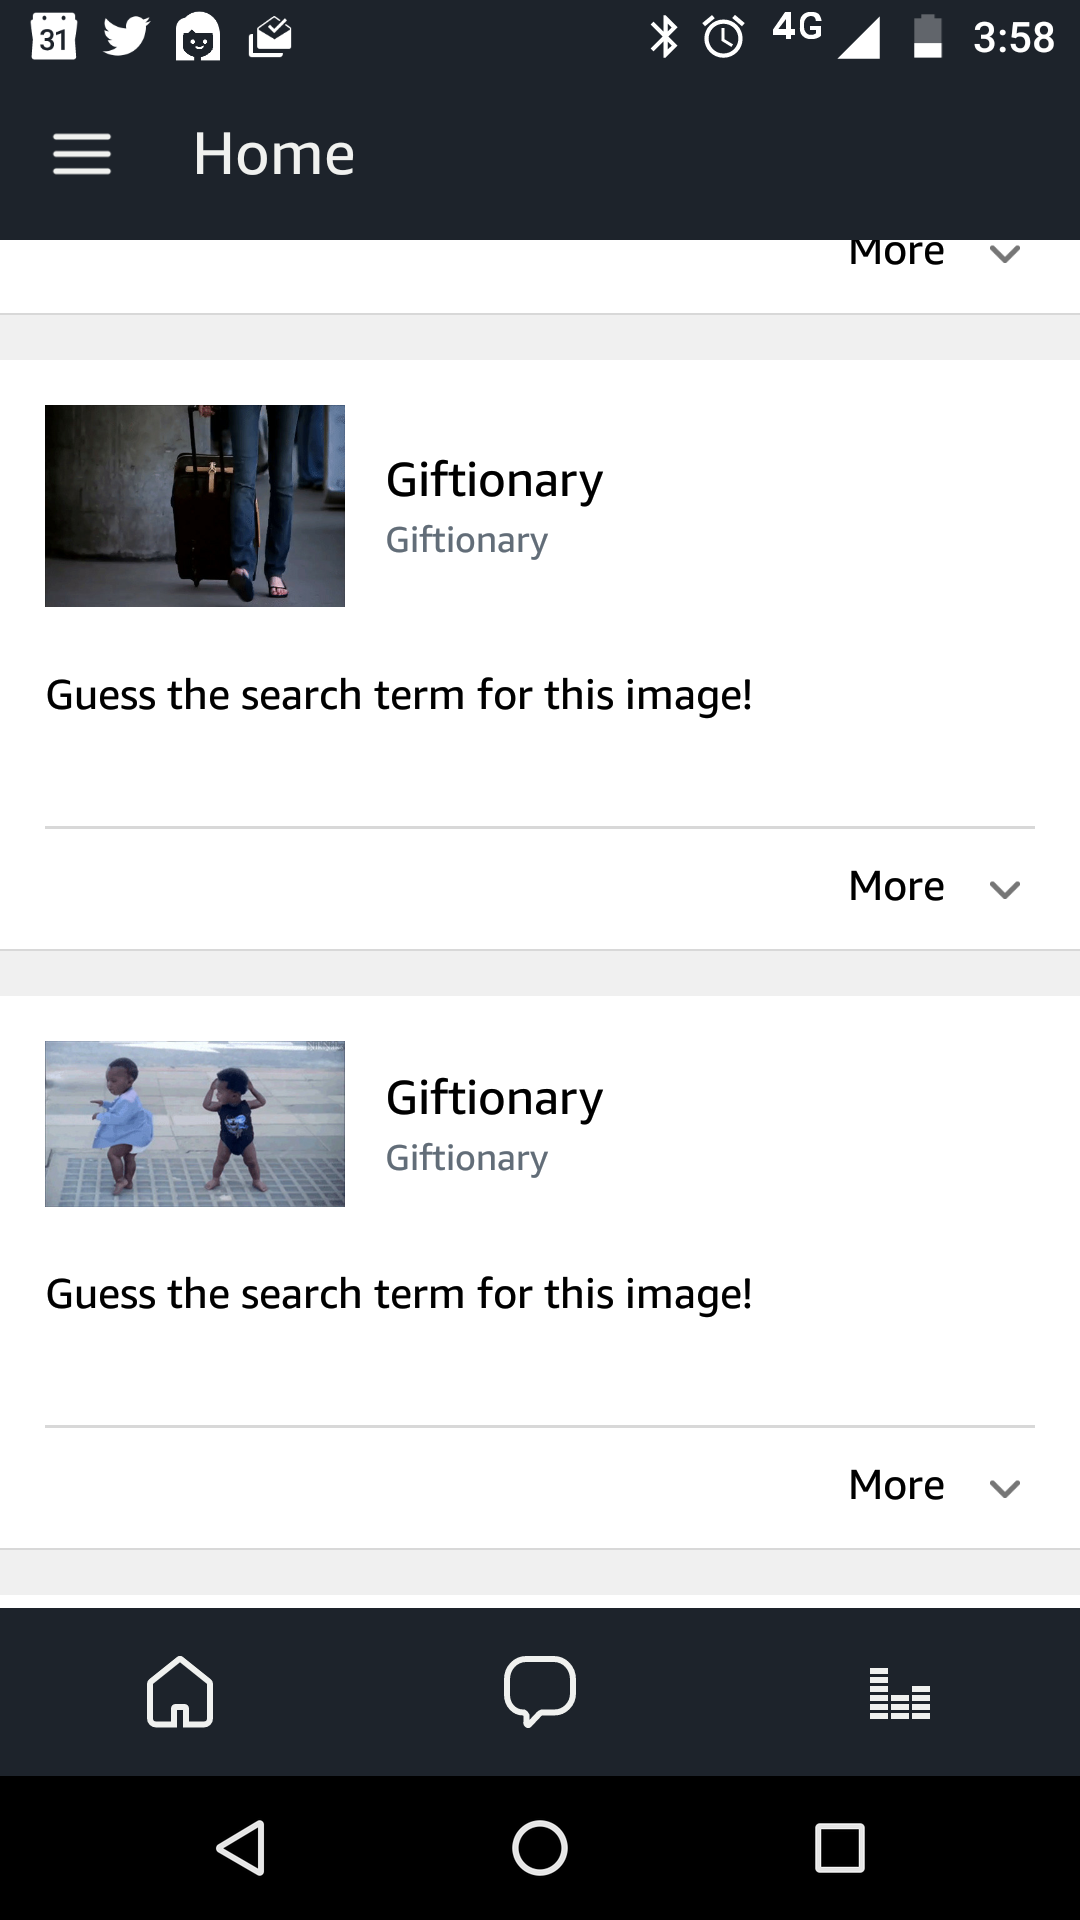
As for the cardRenderer call—cards are images and text that can accompany the skill. In our case, the card displays the image that the user is asked to guess about. We set this image on the card, and also provide additional instructions to the user on what to do (i.e., guess what the image is) - here is a screenshot of how the cards look in the Alexa app on the phone:
Testing Locally
Now that we have a basic working skill, let’s test it out locally! To do this, we’re going to run our proxy via the Bespoken Serverless plugin.
This plugin allows us to interact with a skill on our laptop without deploying it to Lambda. It saves a lot of development time; even though Serverless makes deployments a lot easier, it still takes time to upload our Lambda file with all its dependencies to AWS.
Setting up a new skill in the developer console
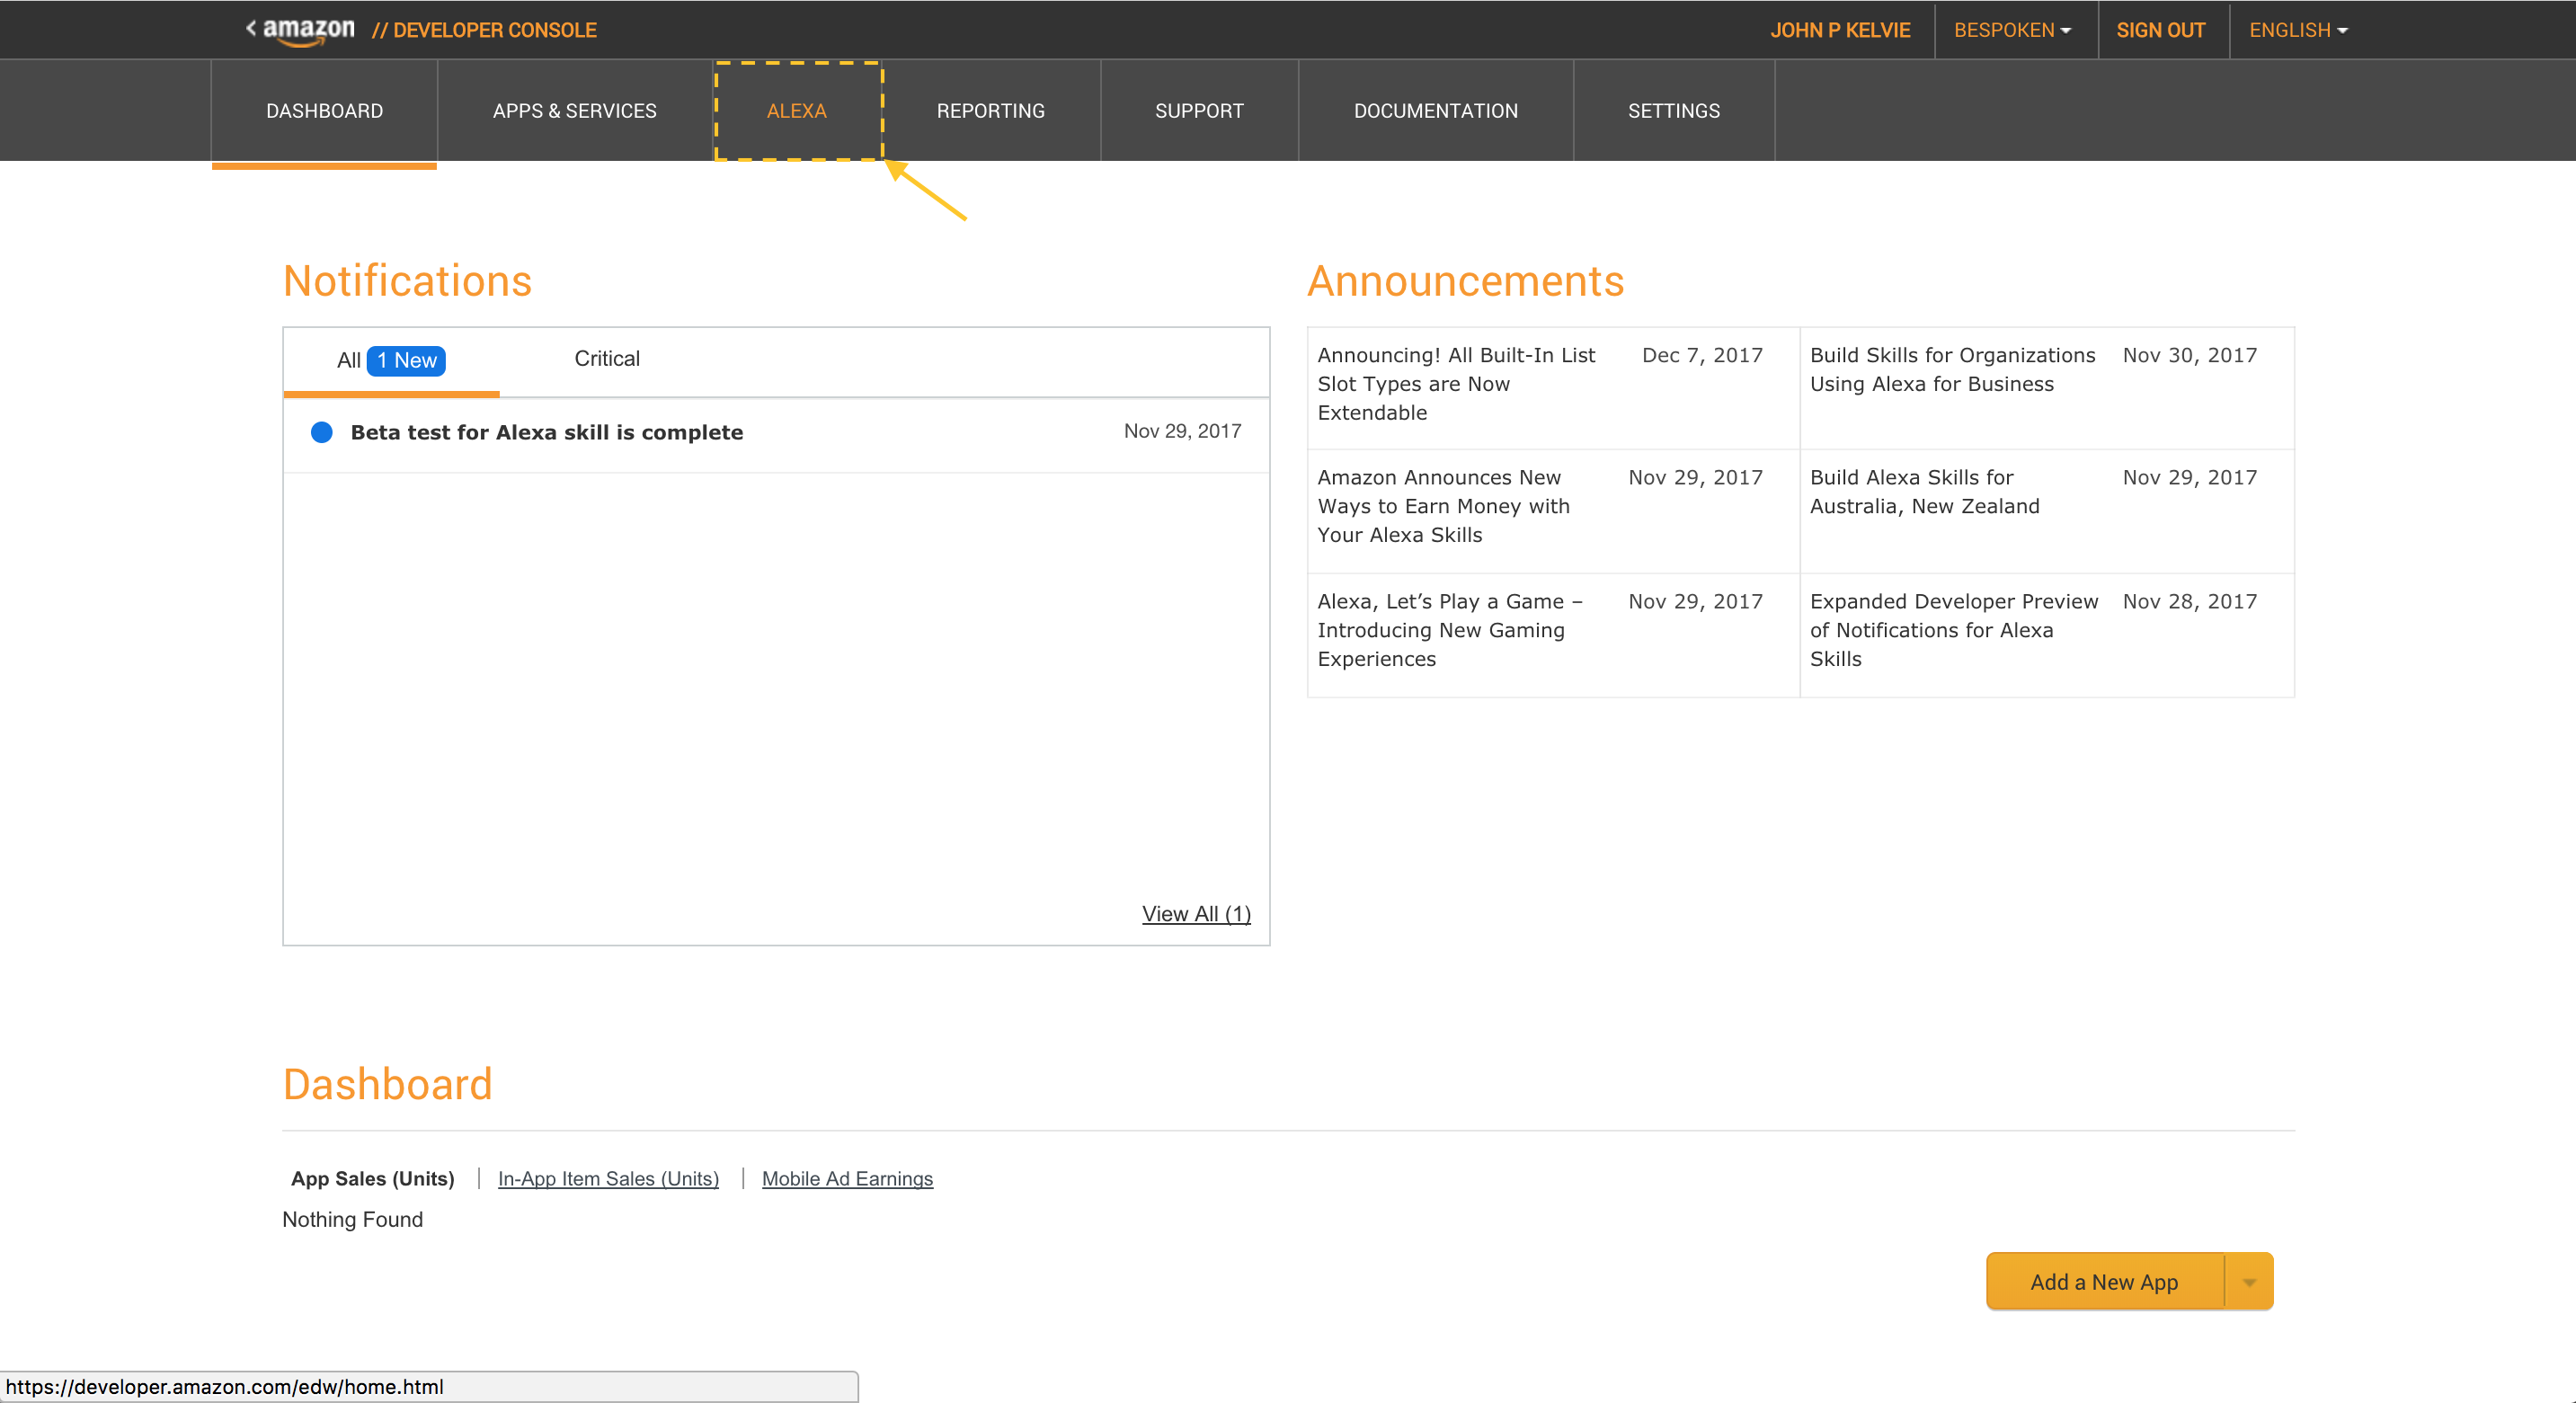
Before we go further, we need to set up our Alexa skill in the developer console.
In the Developer console home, click on “Alexa”:
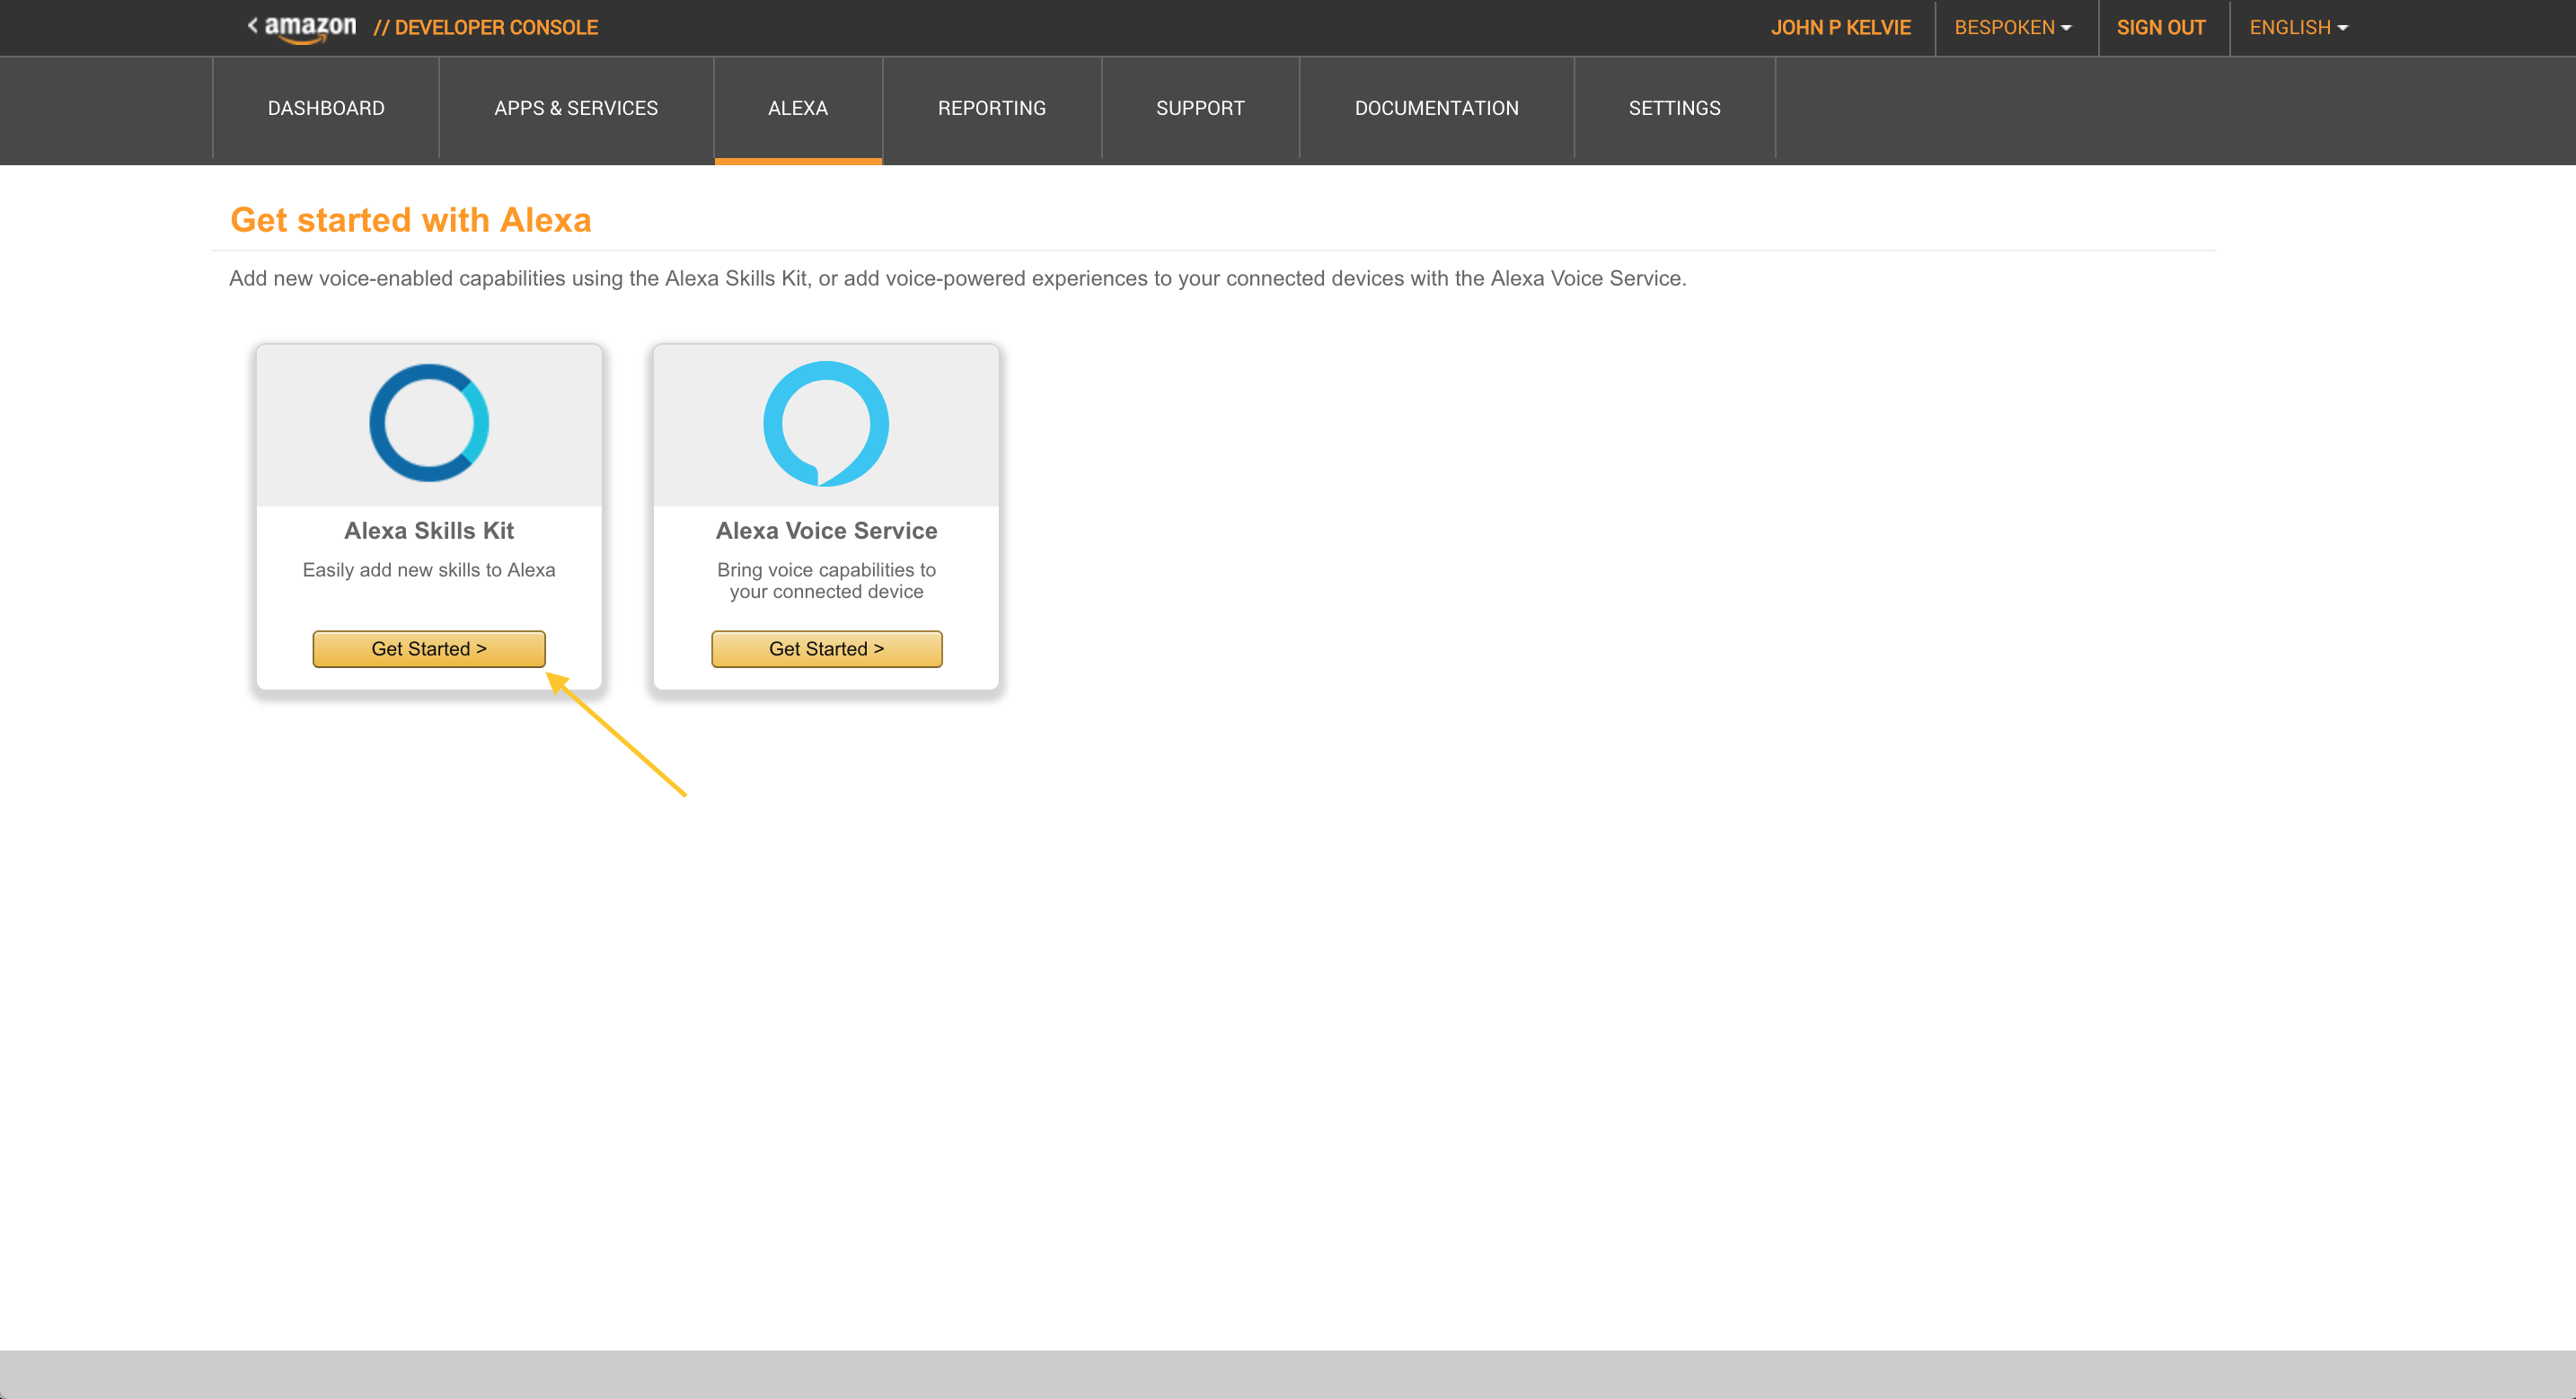
Then “Get Started” under “Alexa Skills Kit”:
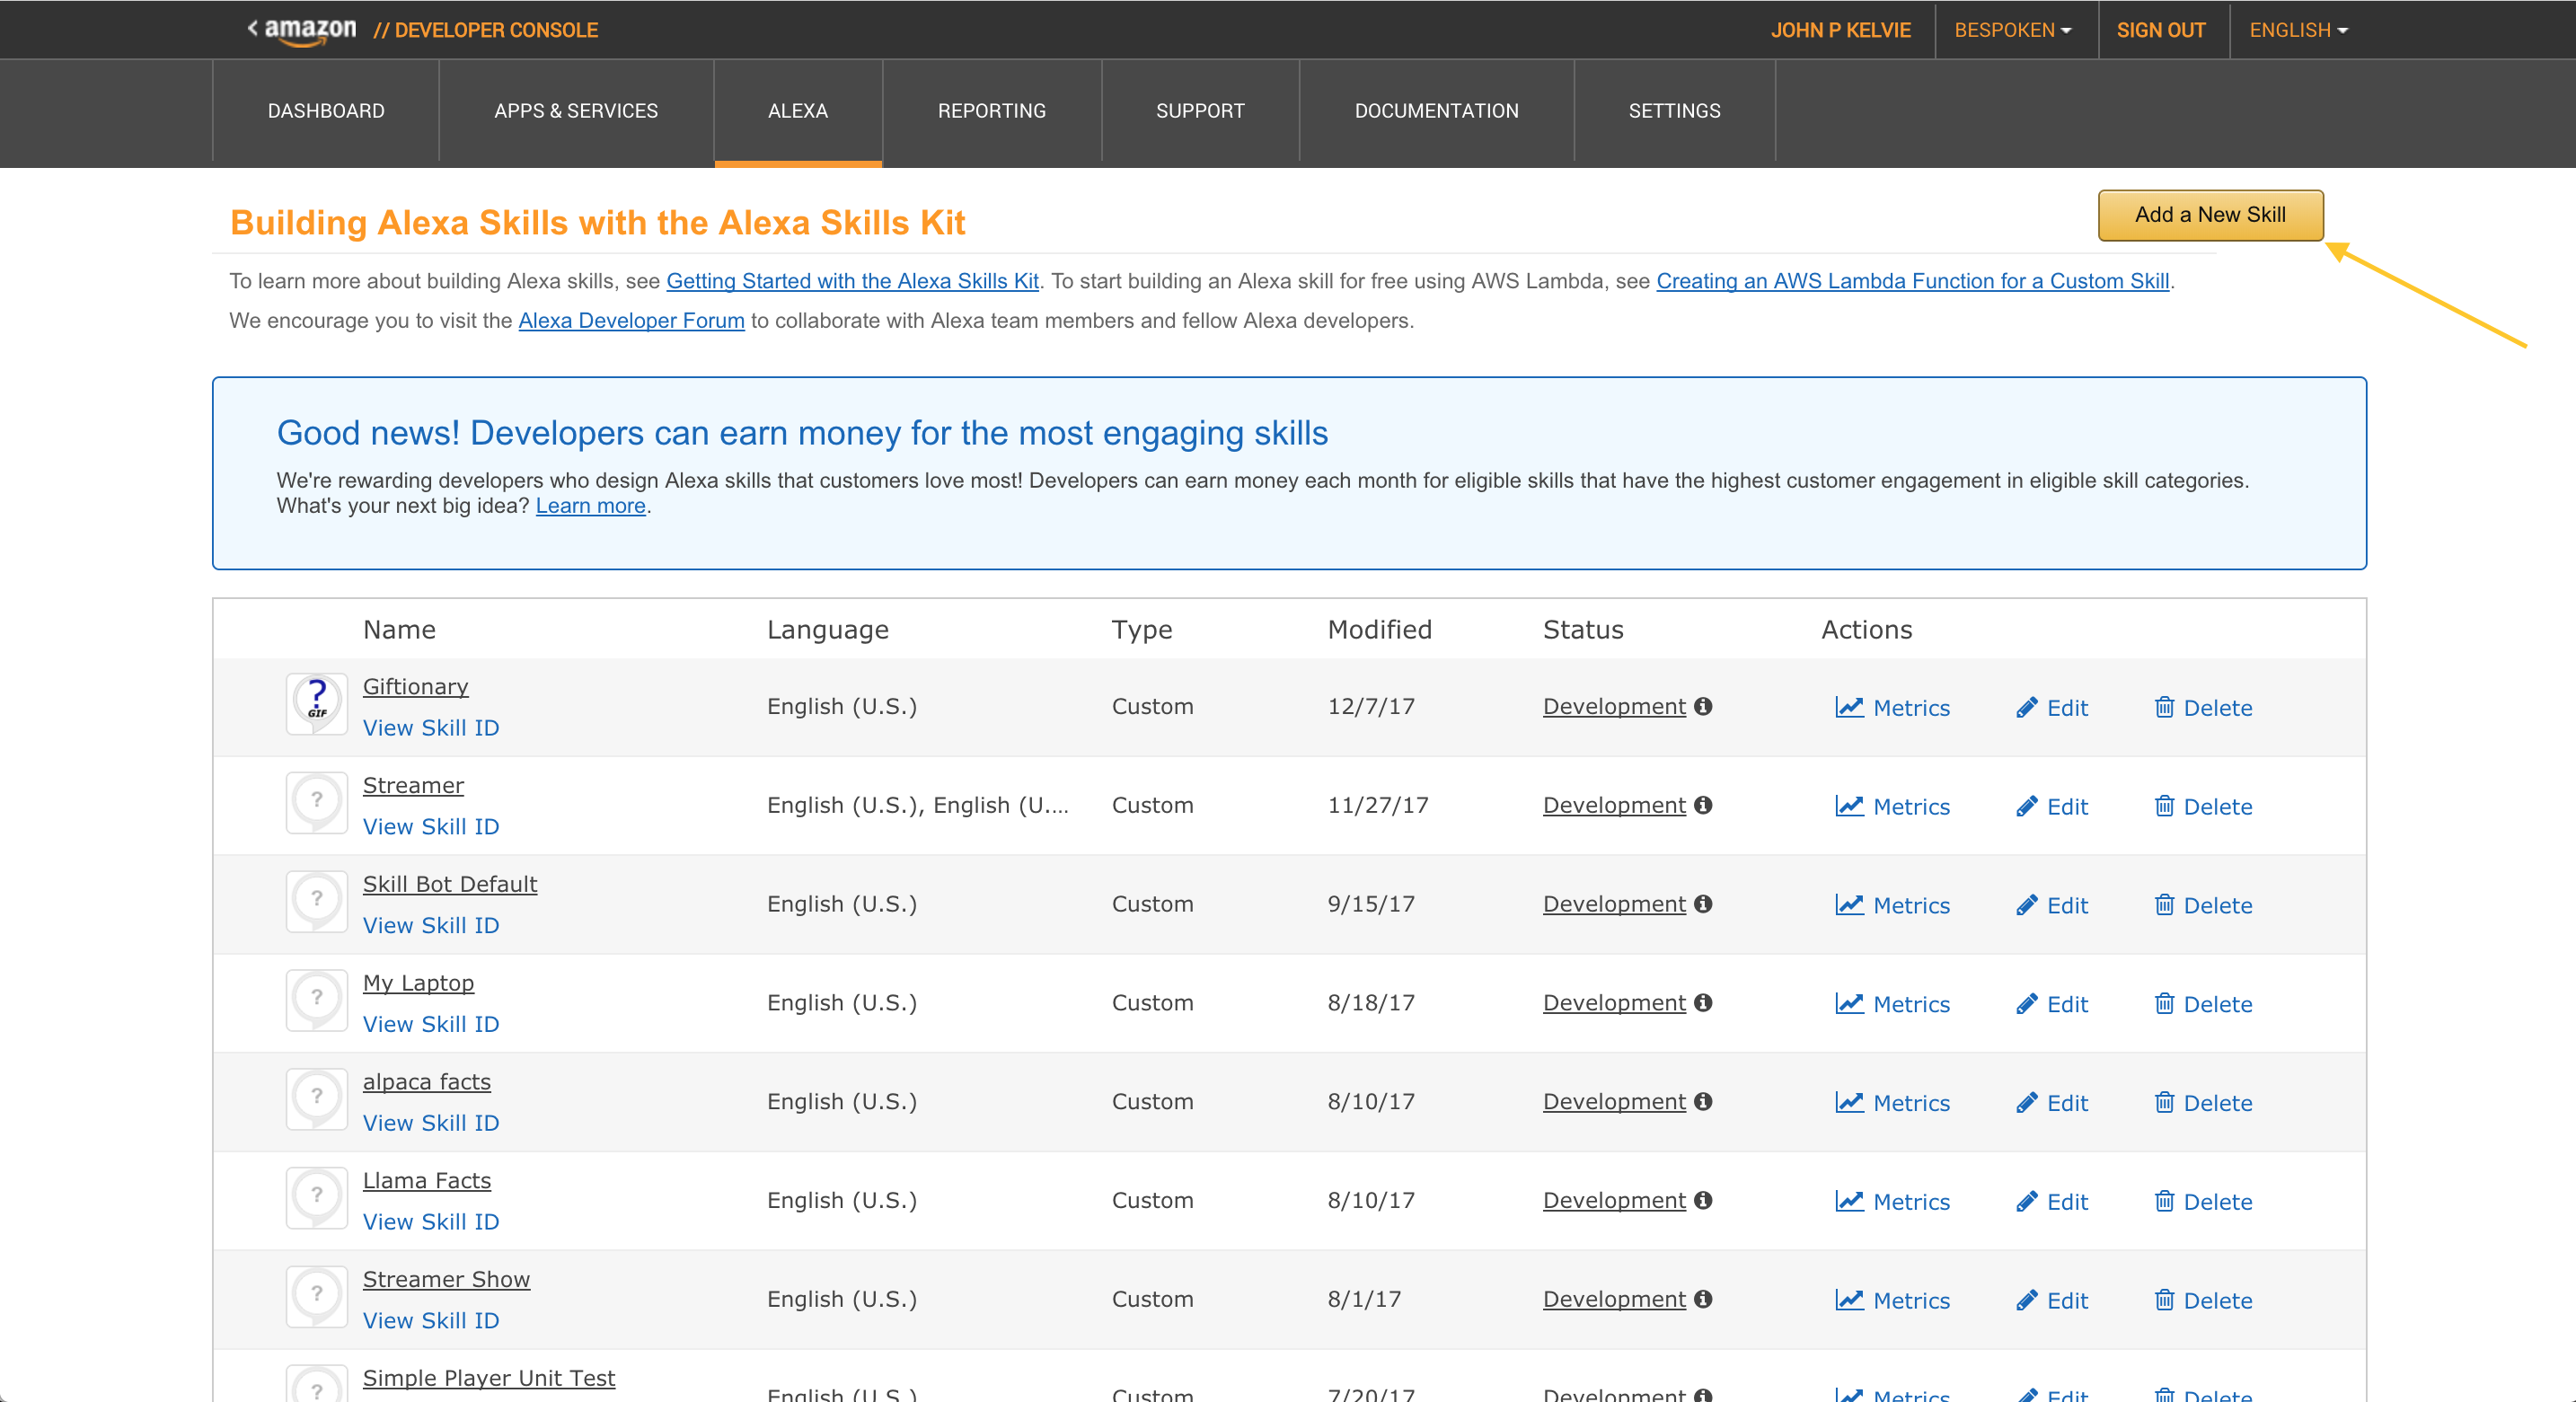
And finally click “Add New Skill” in the top right:
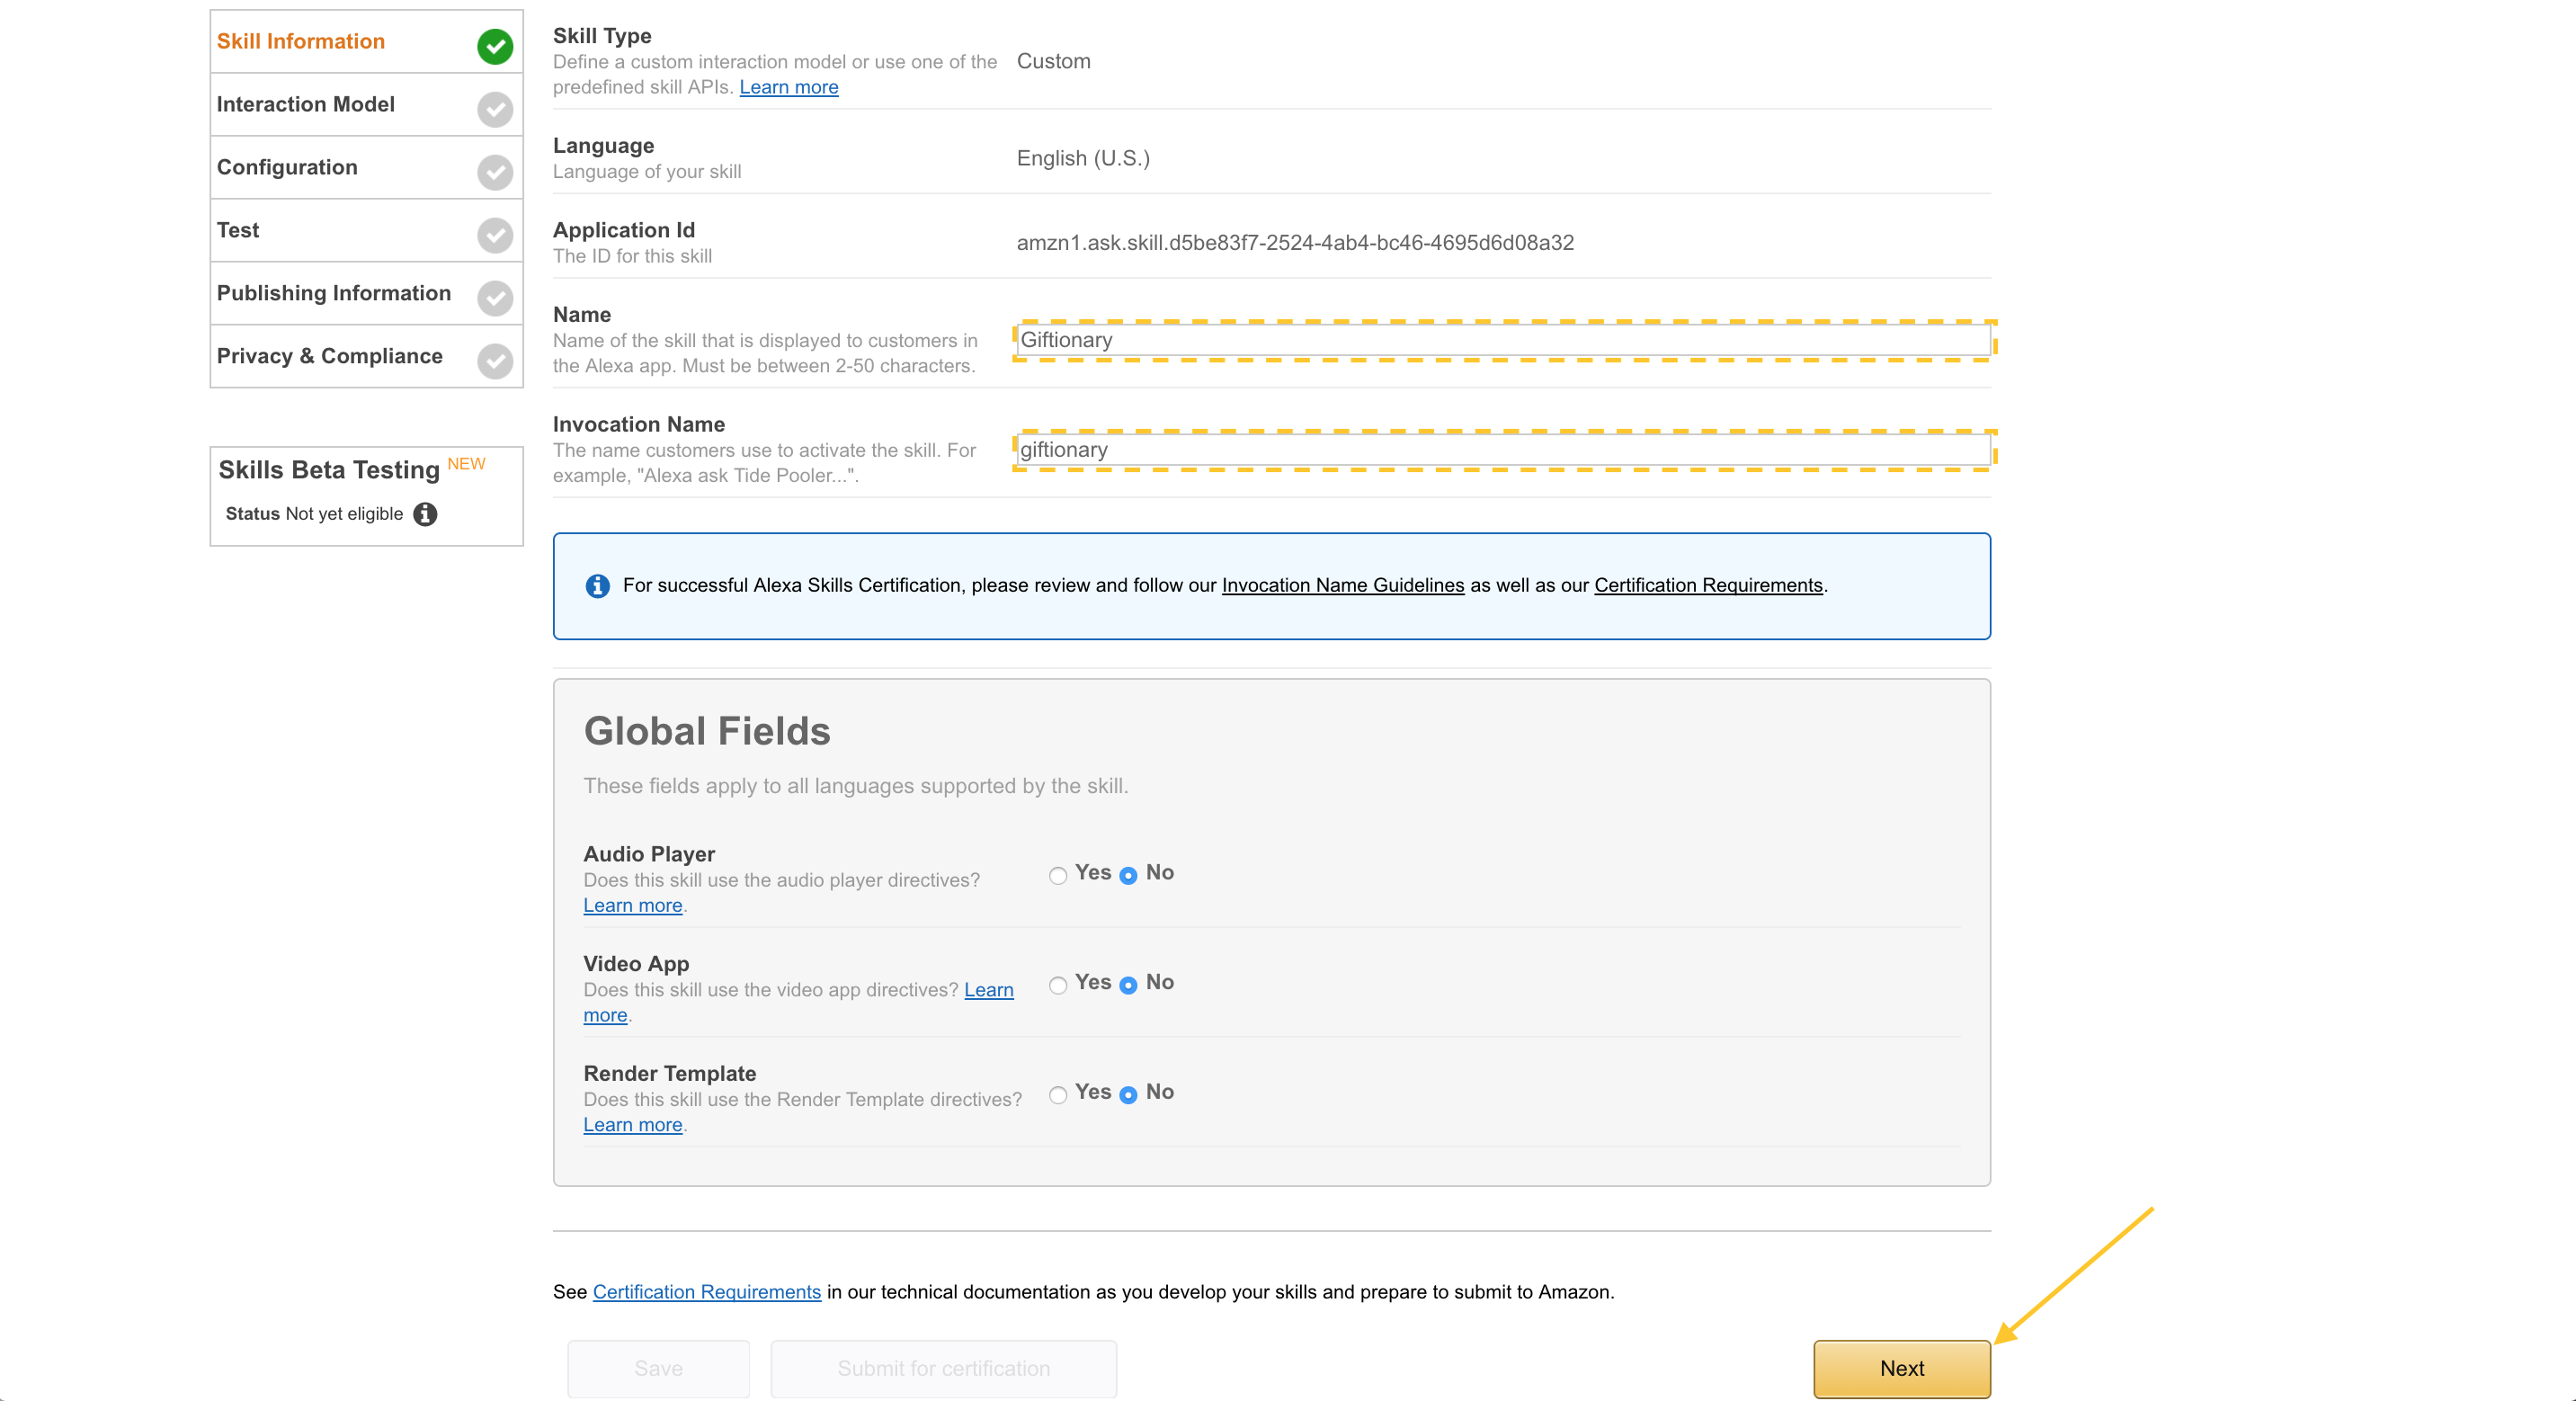
Here, you’ll need to enter the Skill Information as shown:
- Name: Giftionary
- Invocation Name: Giftionary
Then click “Next”:
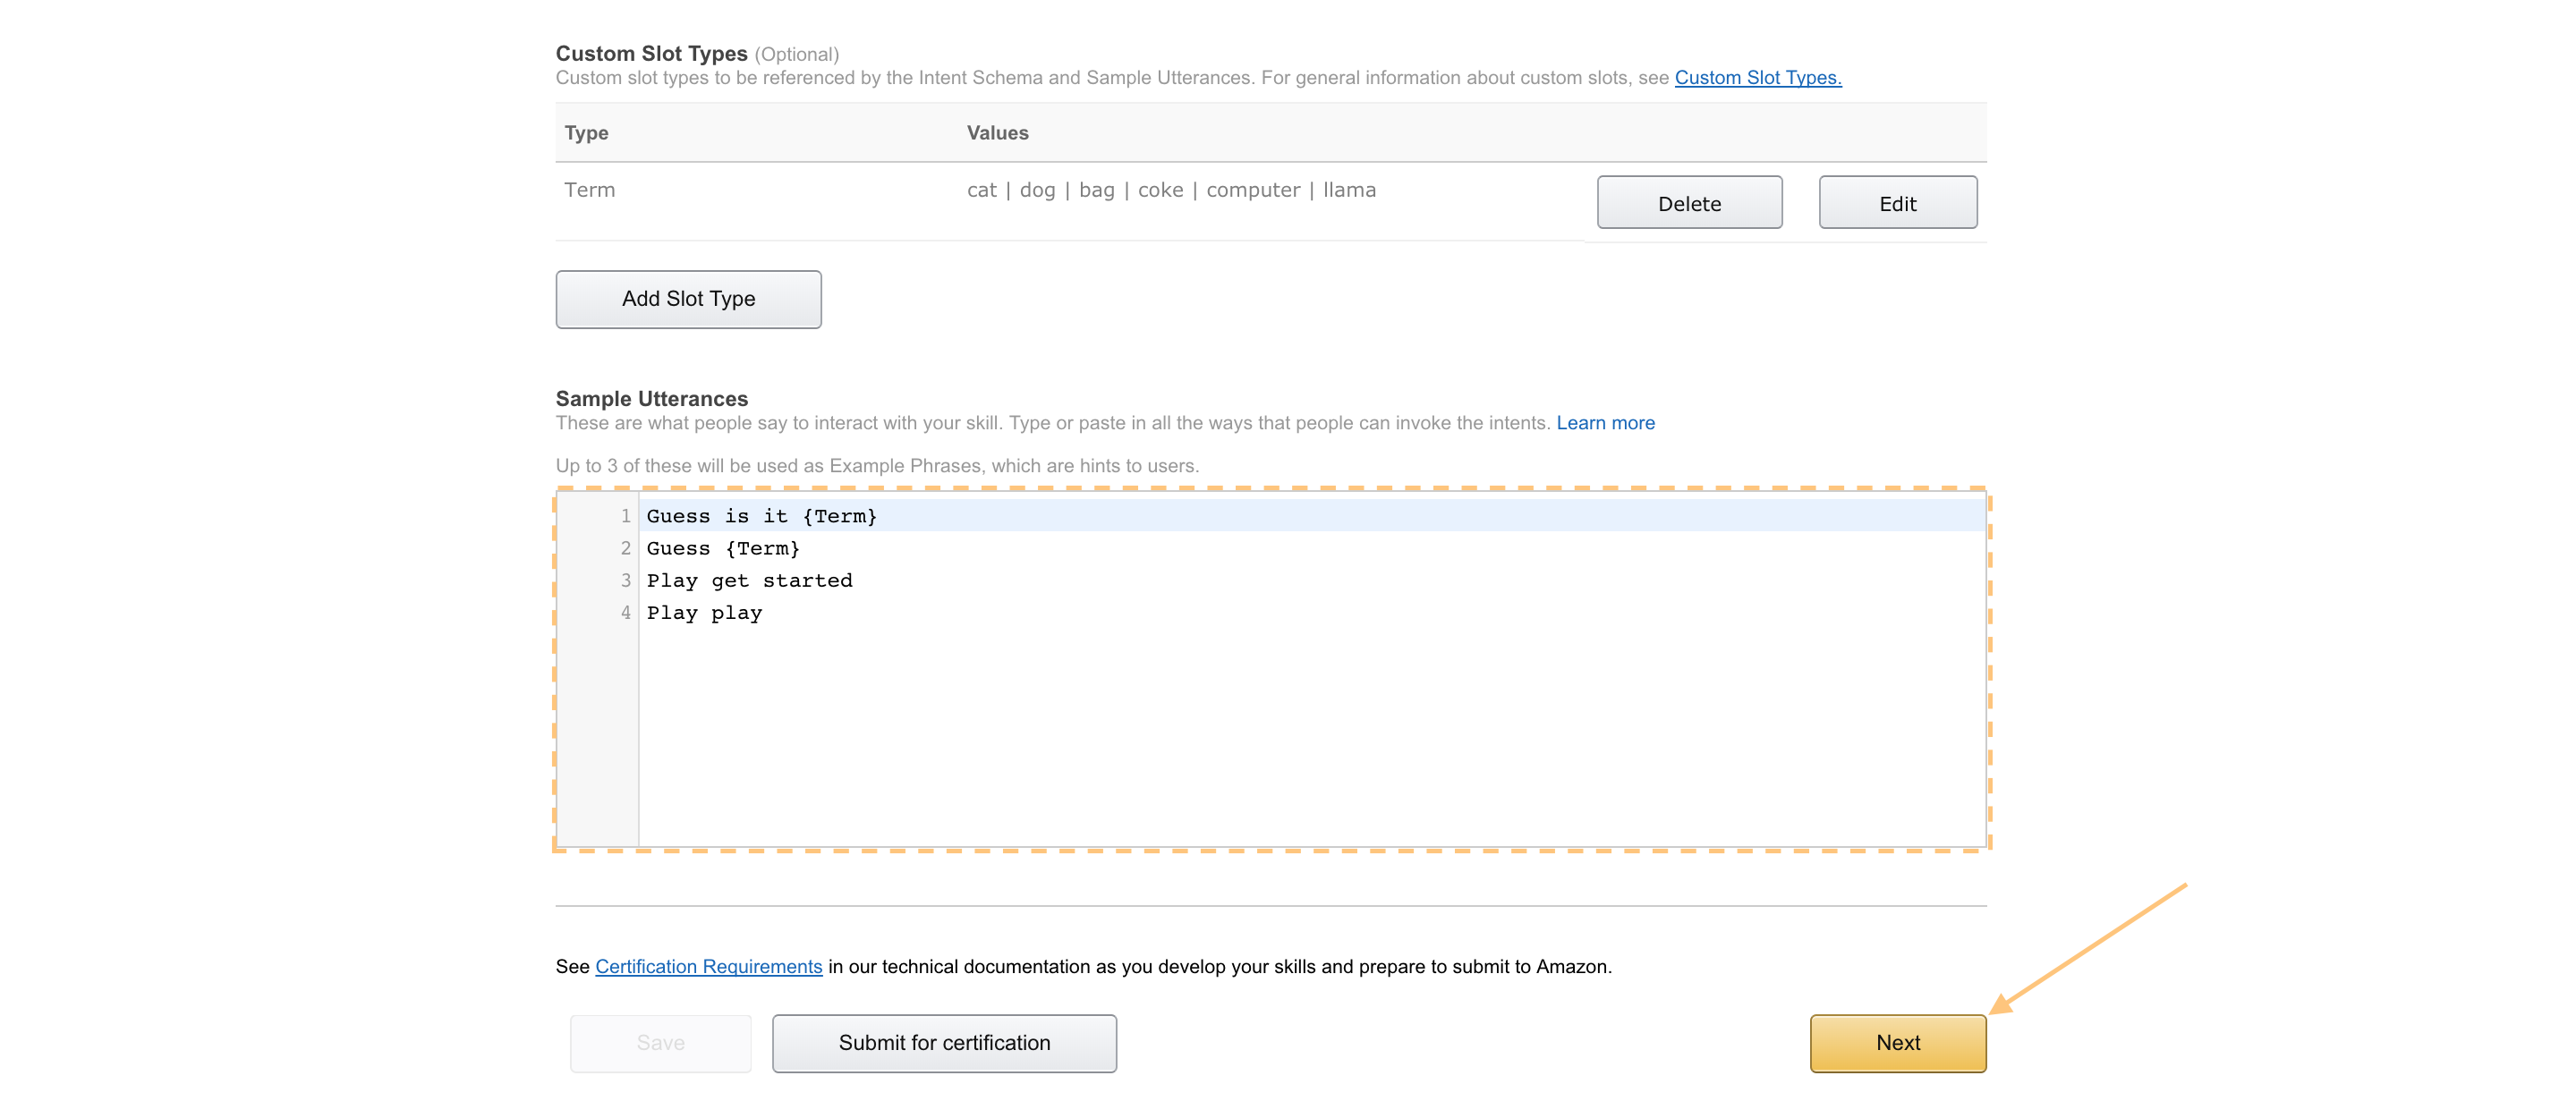
Copy the contents of speechAssets/IntentSchema.json into the Intent Schema:
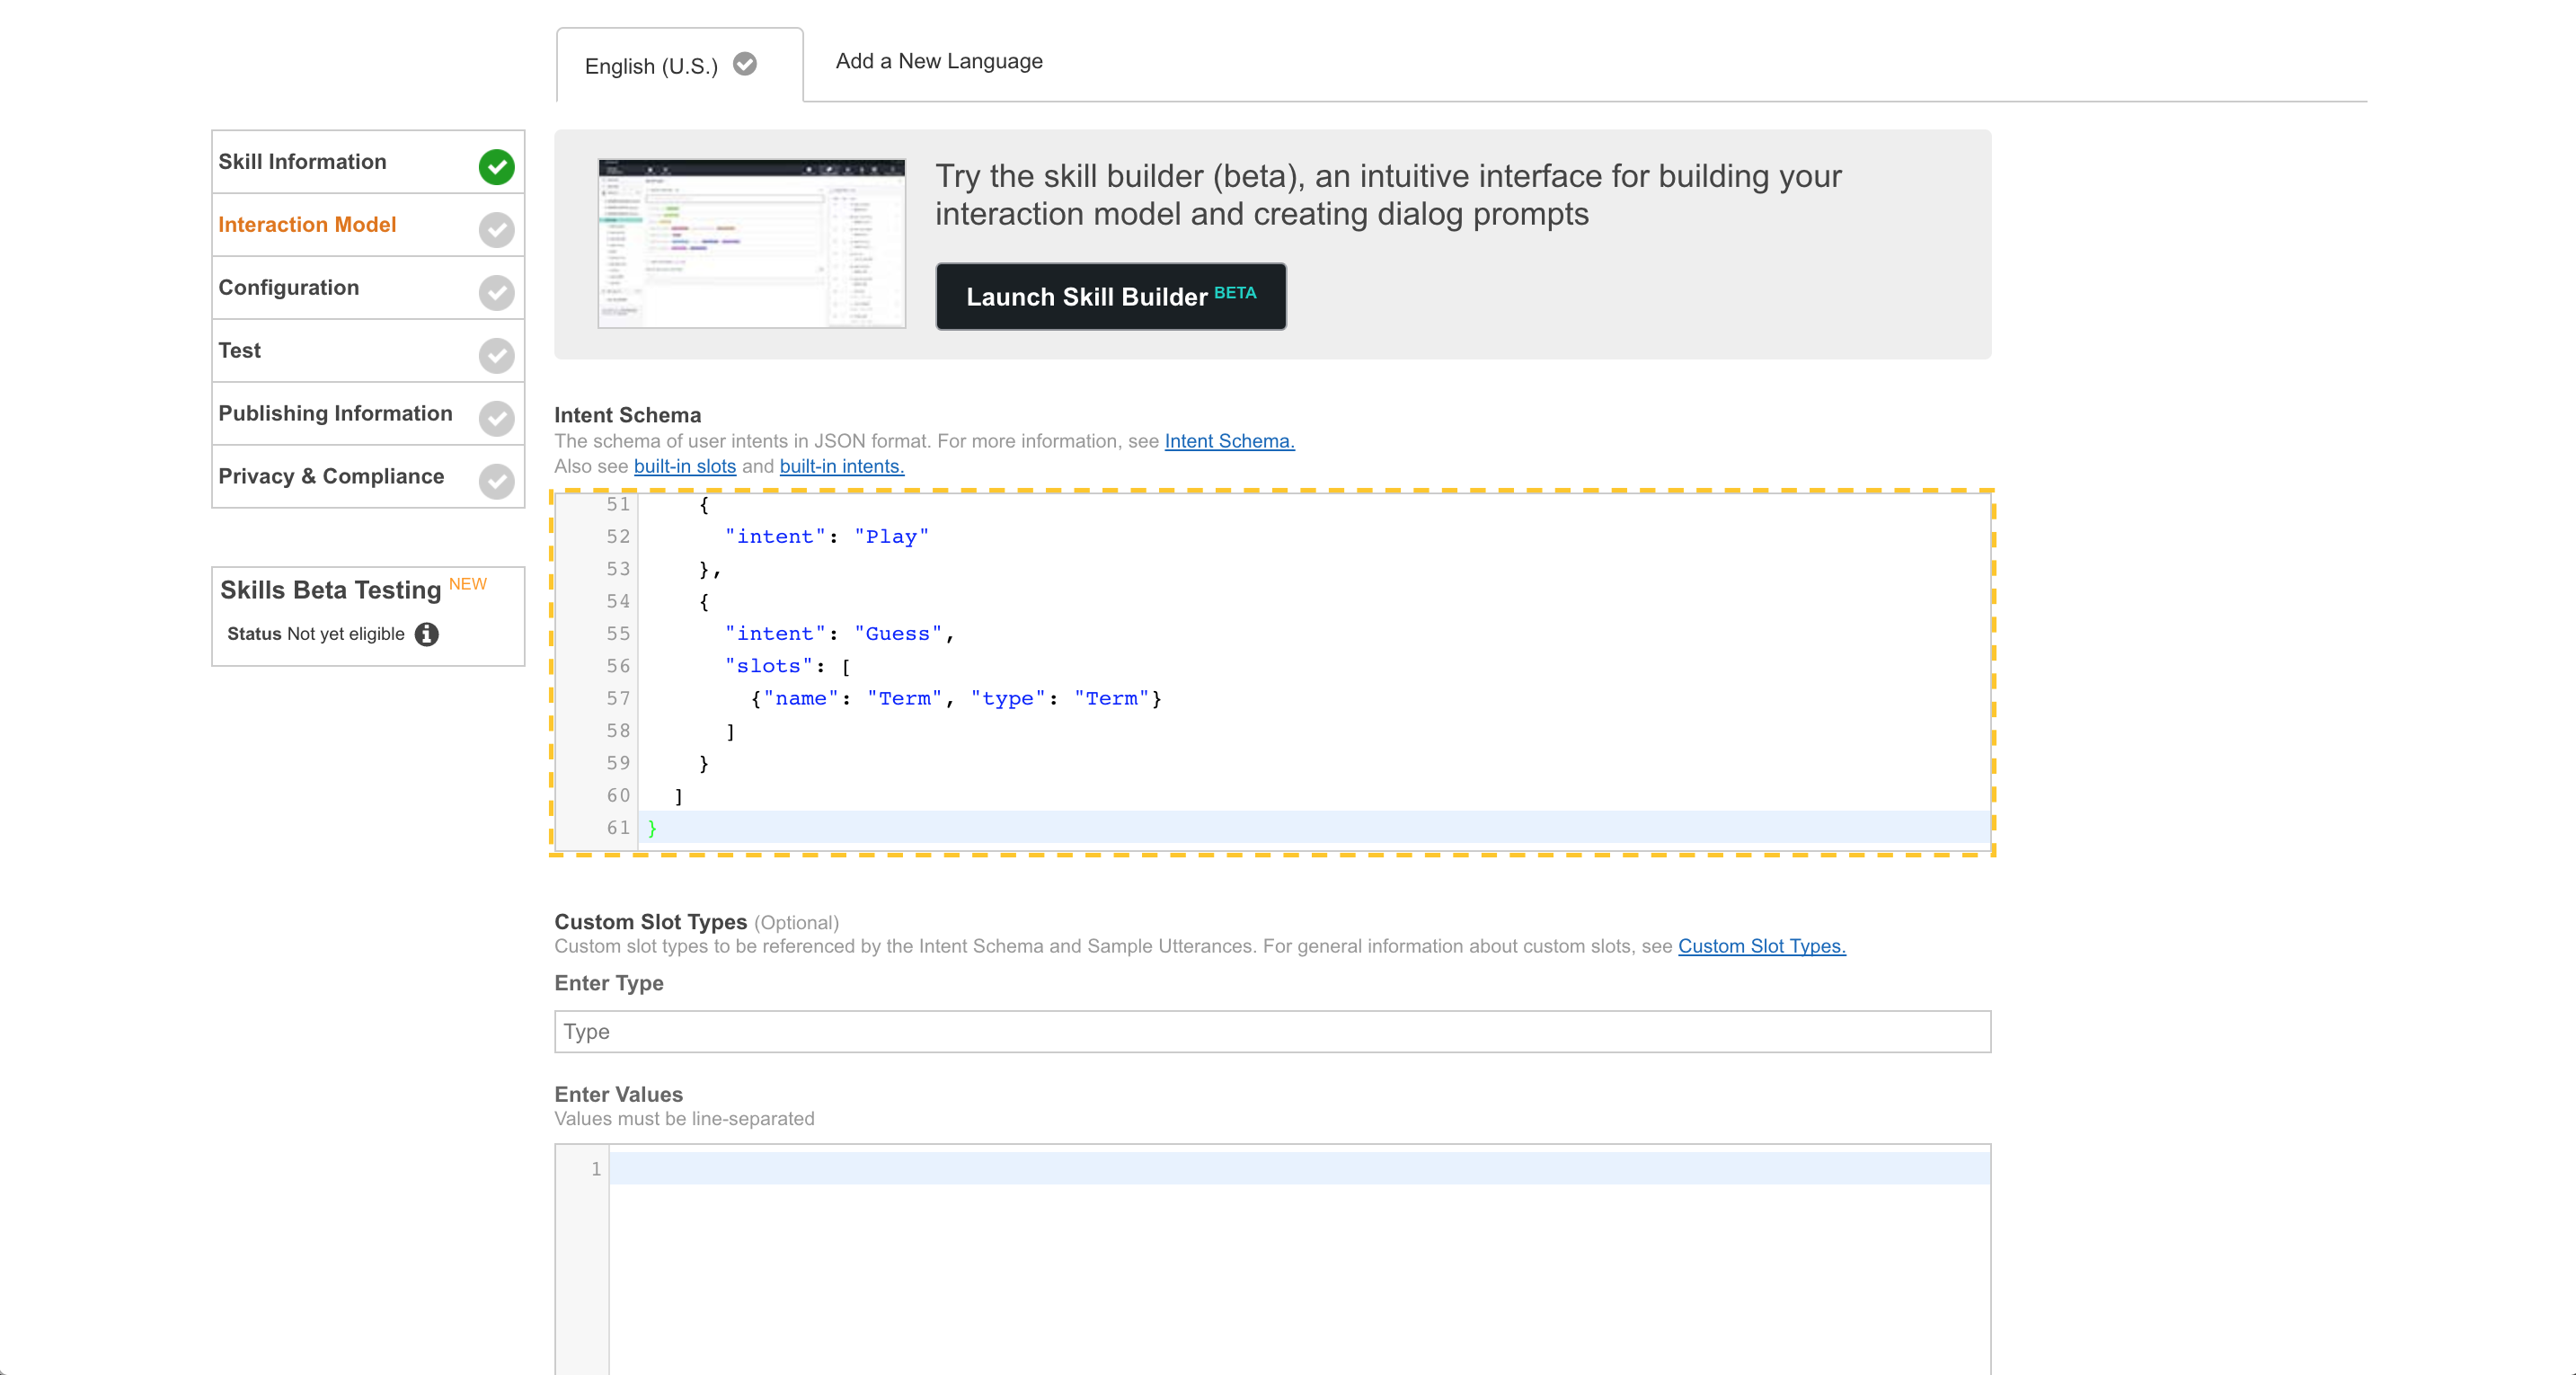
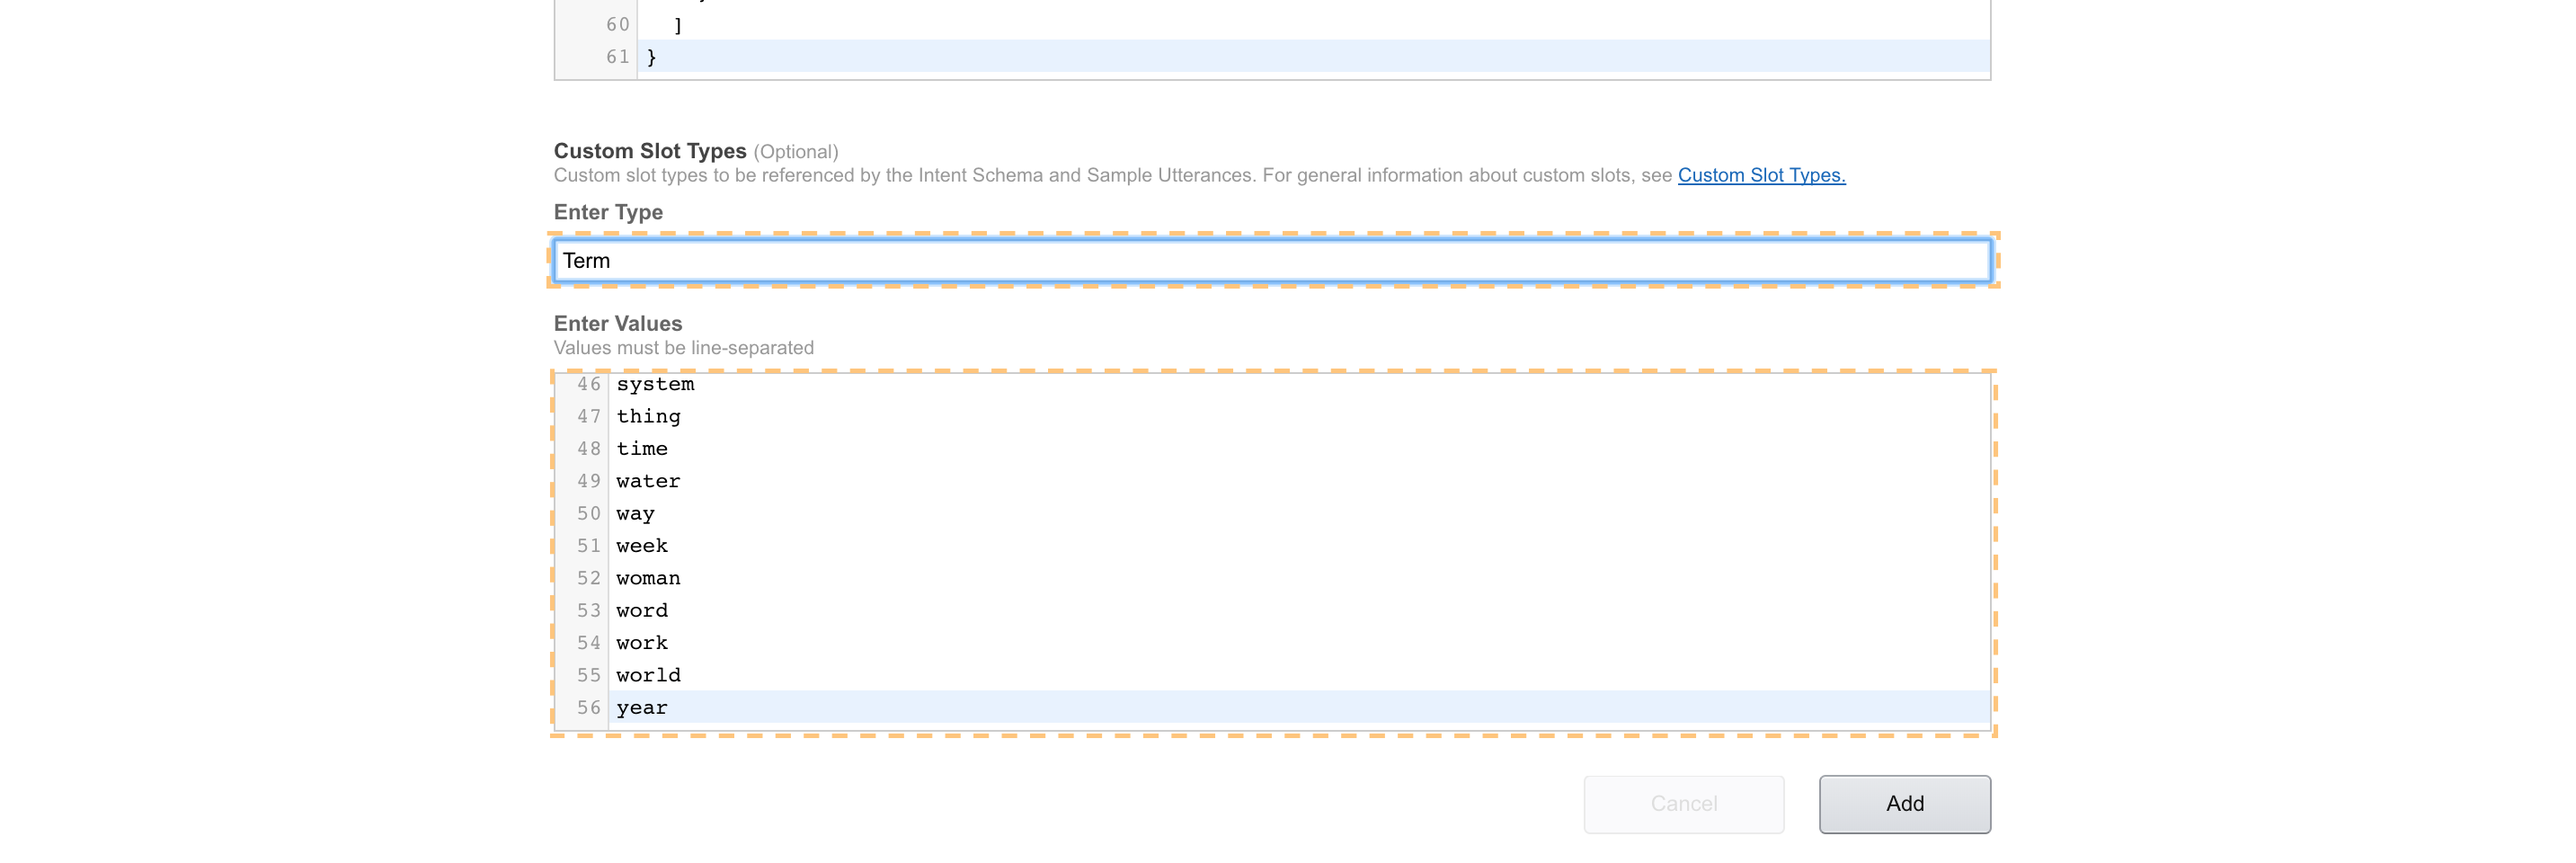
Under “Custom Slot Types” -> “Enter Type”, put “Term”.
Then copy the contents of speechAssets/TermsSlot.txt to the “Enter Values” section, and then click “Add”.
Copy the contents of speechAssets/SampleUtterances.txt to the Sample Utterances section.
And with that, you’ve set up the Interaction Model!
Now click “Next”; it will probably take a moment to process:
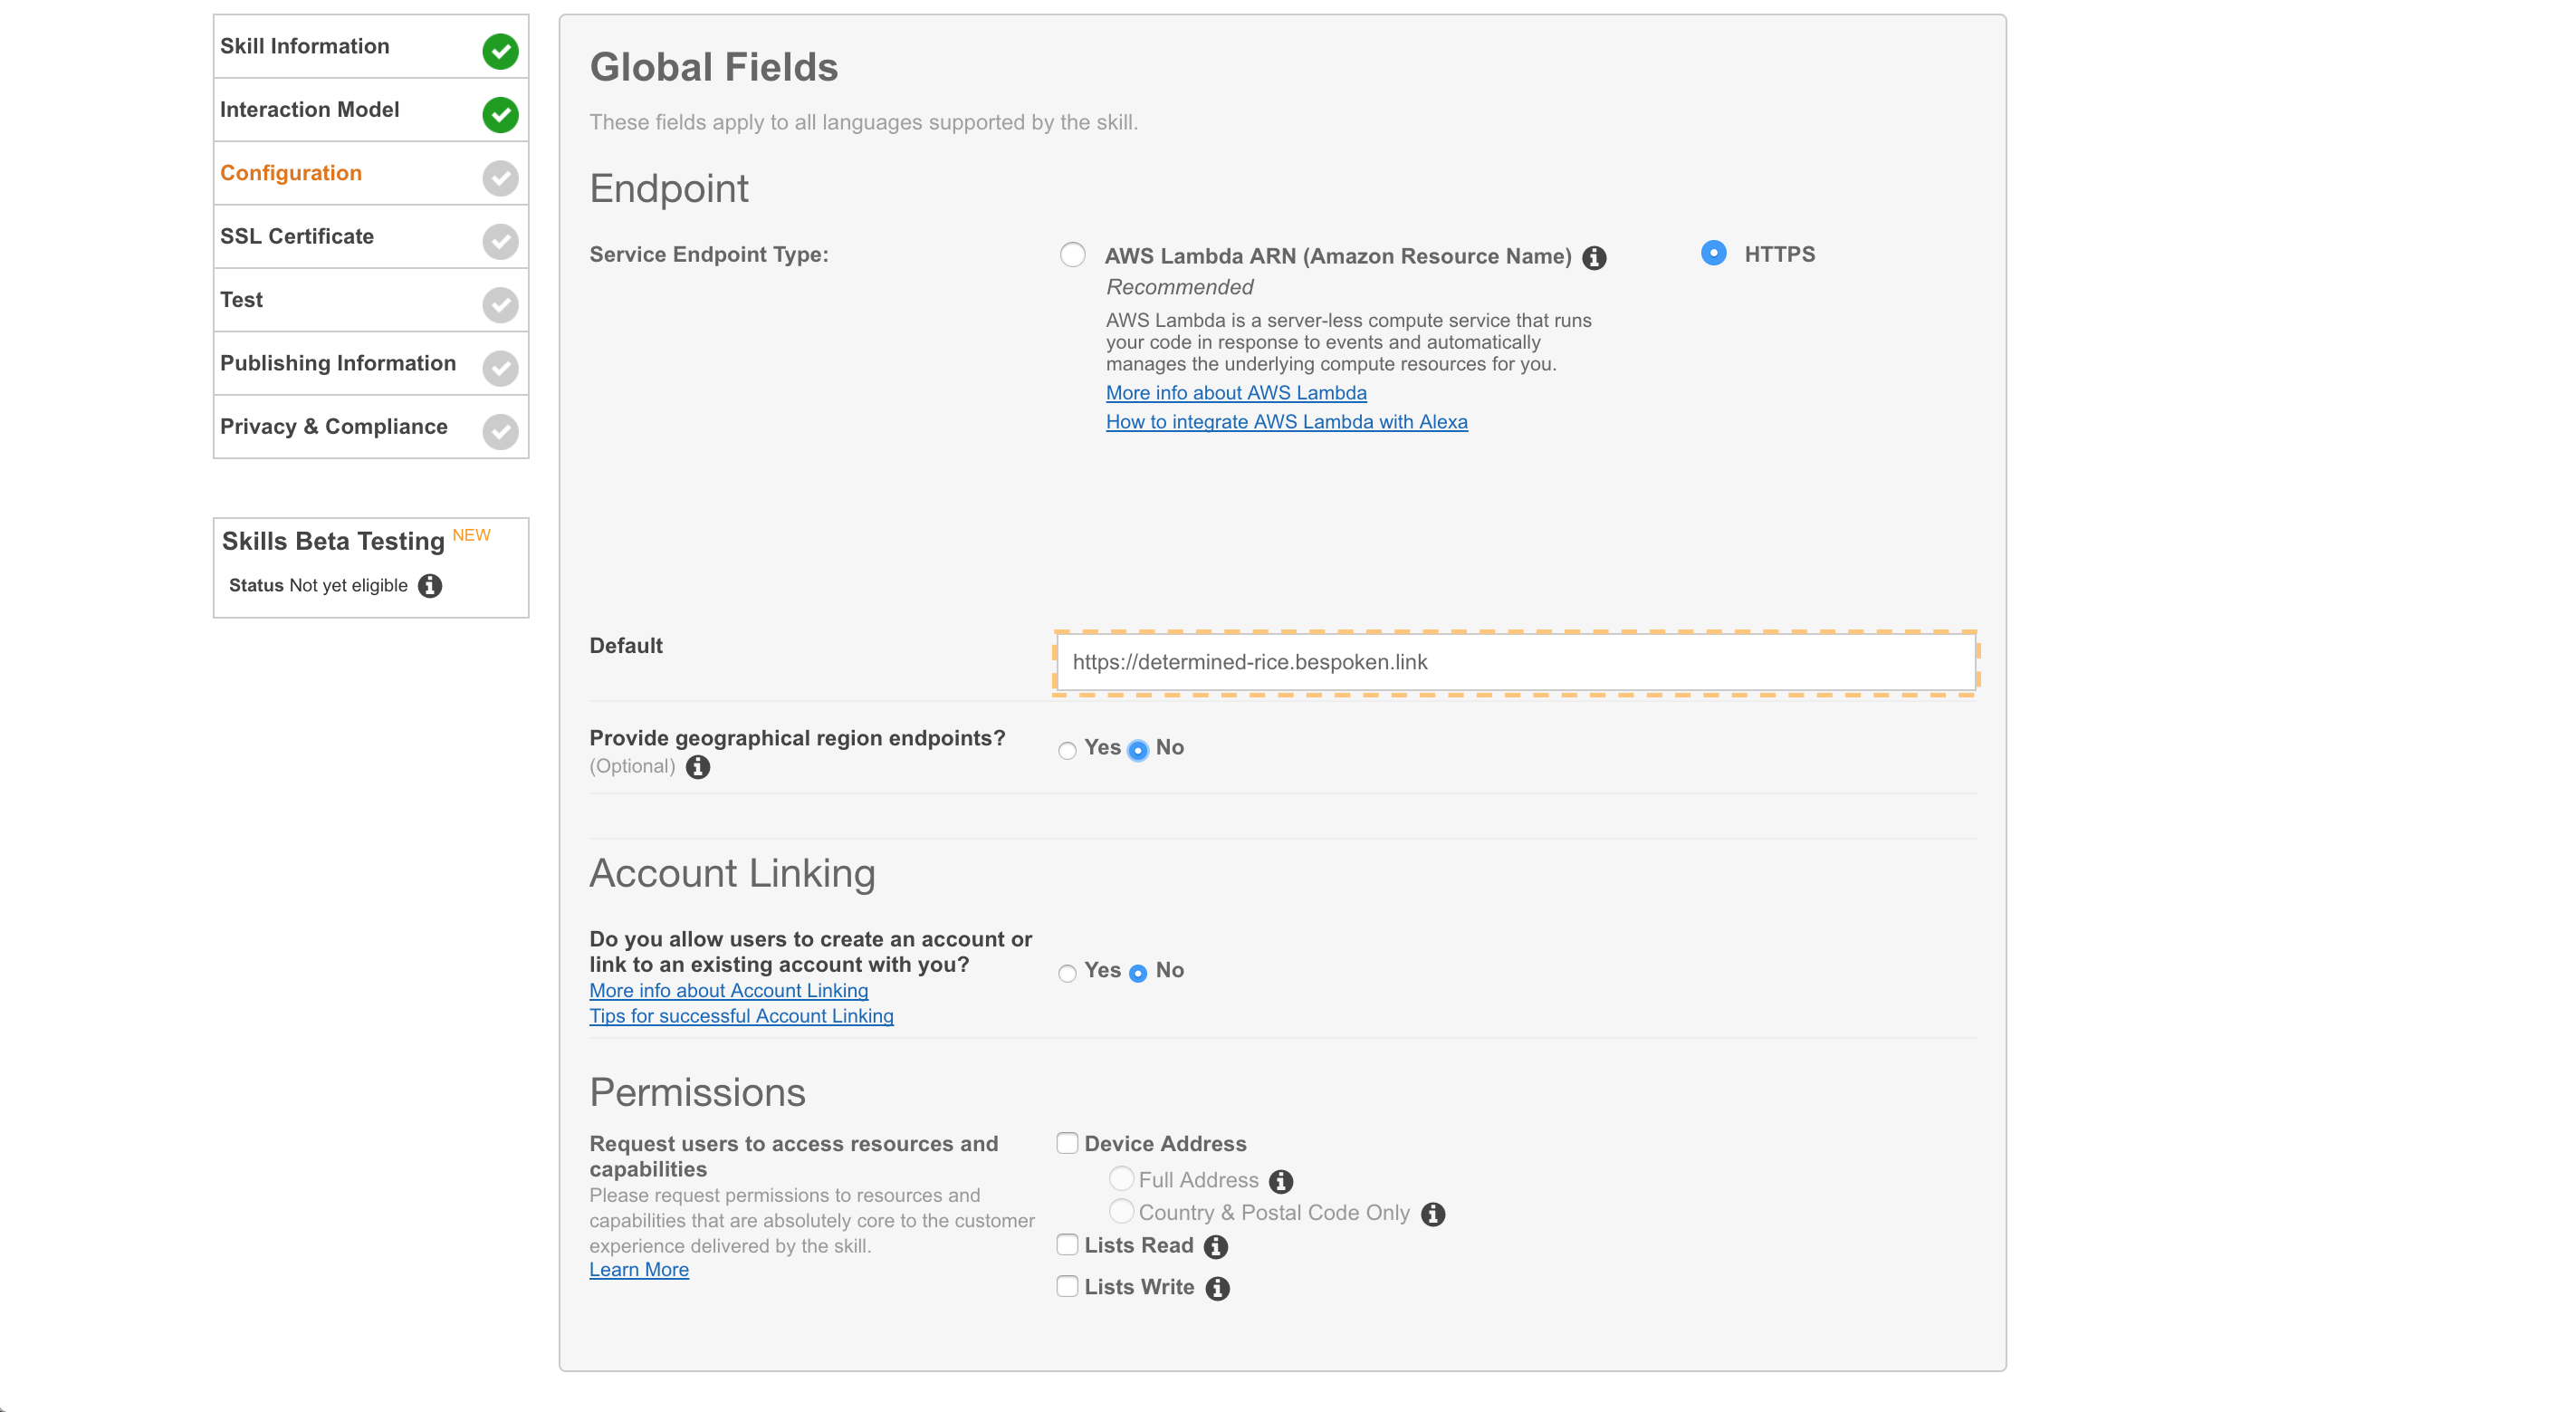
Select “HTTPS” for Service Endpoint Type. We are going to use Lambda for deployment, but for local testing we’re using the Bespoken endpoint.
Remember the terminal window we opened earlier, where we ran sls proxy? Copy the URL that is printed out there and enter it in the “Default” field:
Select “No” for “Provide Geographical Endpoints”, and then click “Next”:
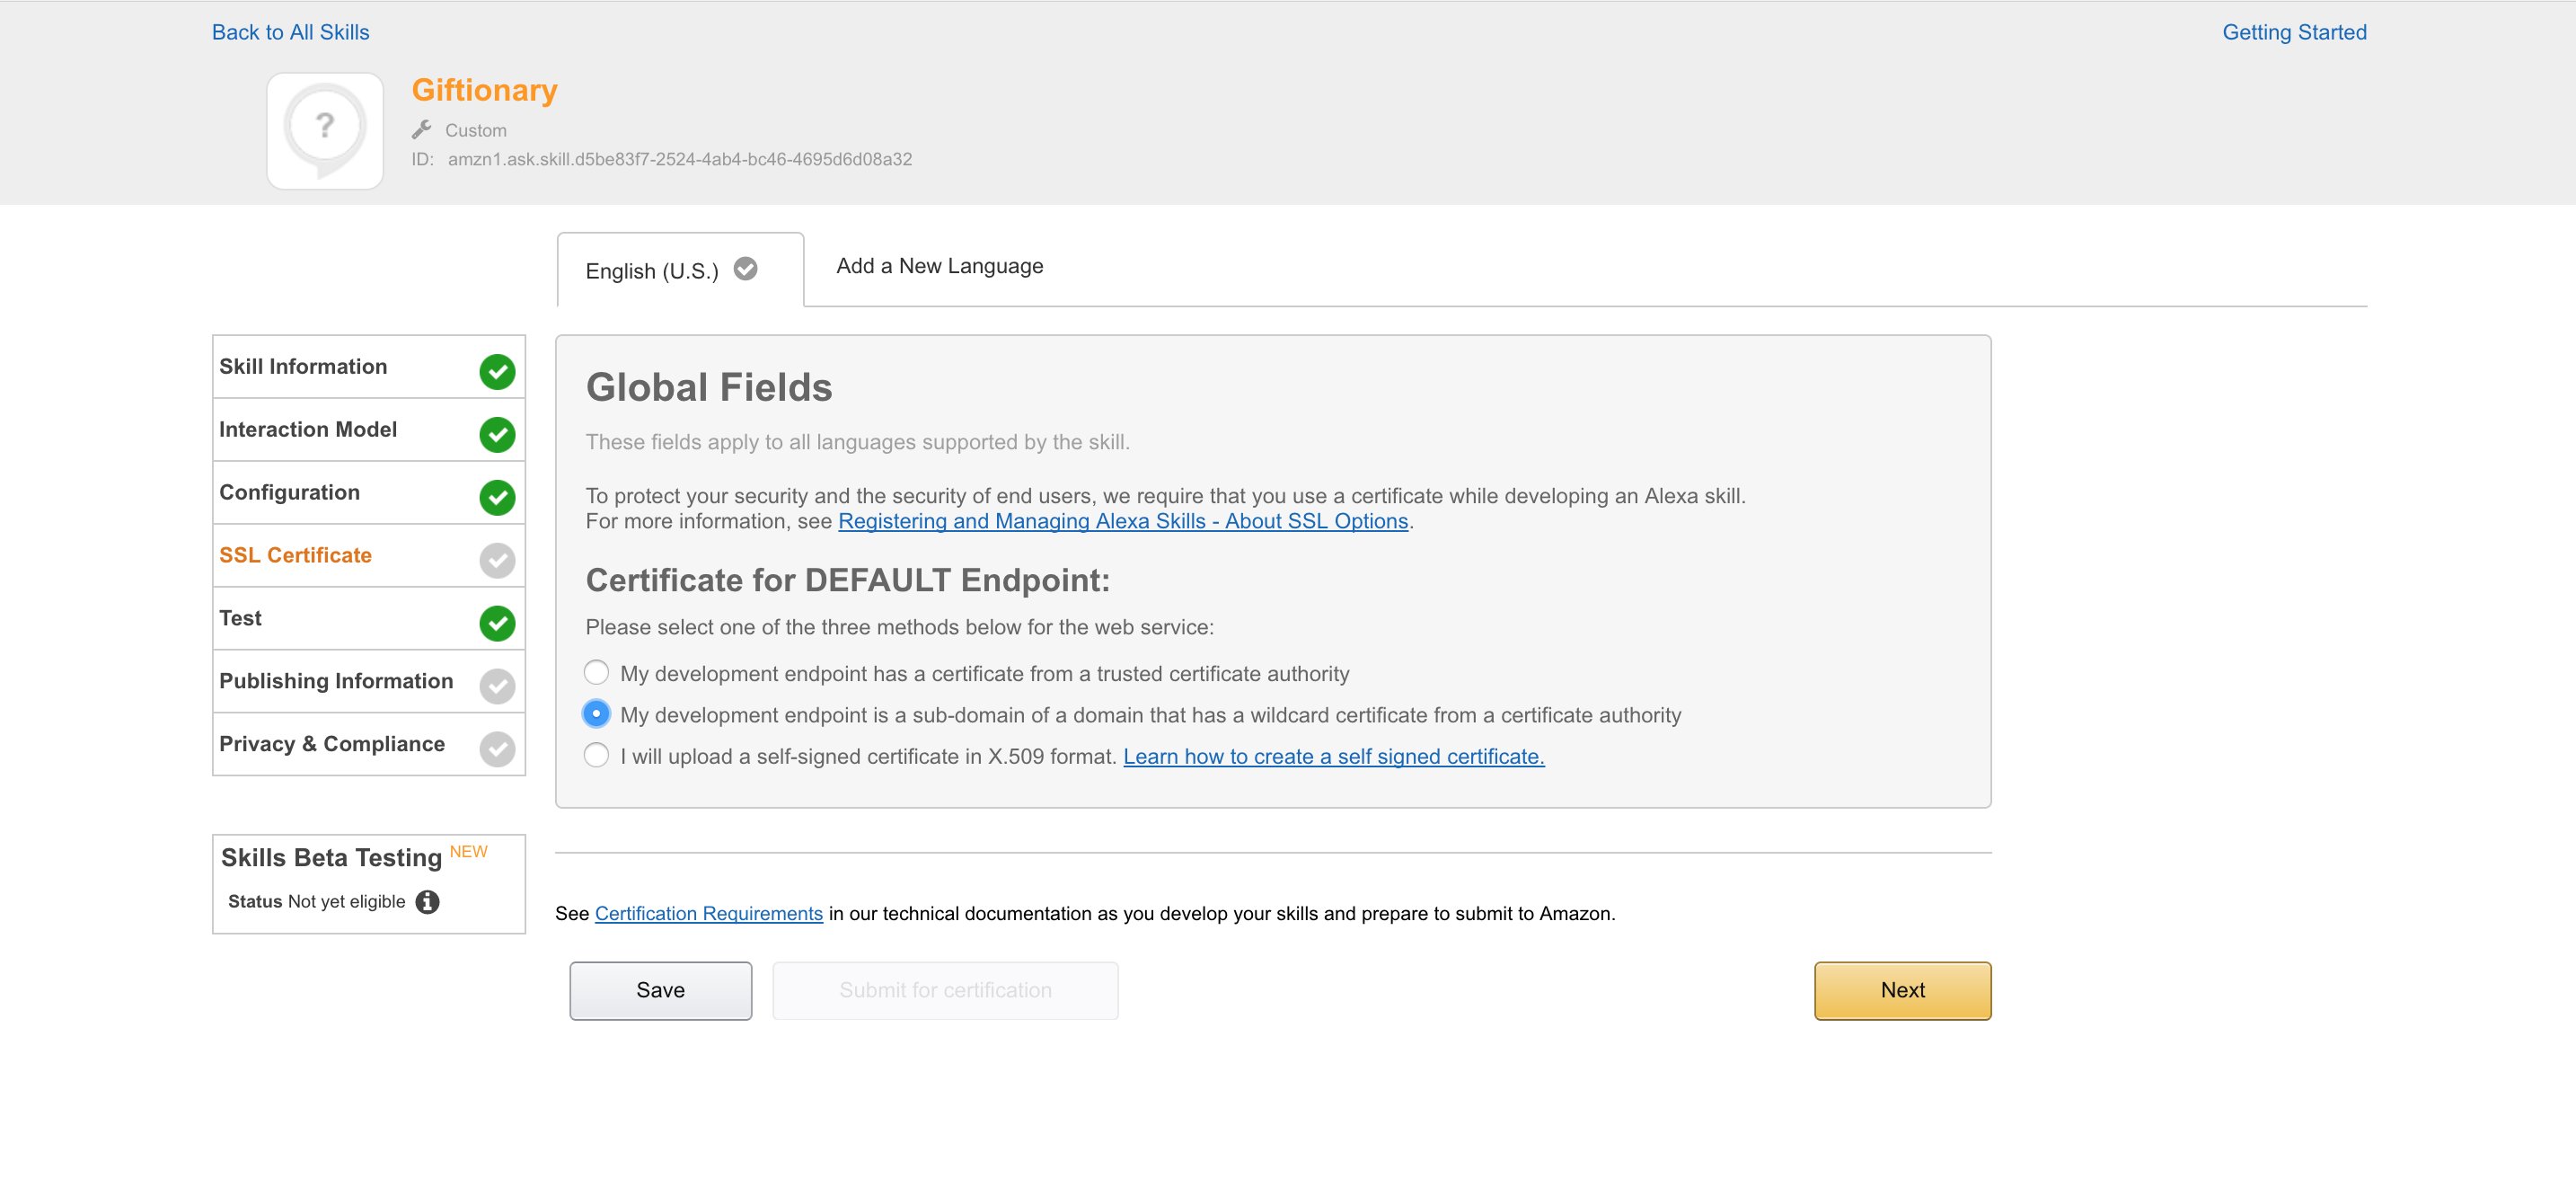
Under “Certificate for DEFAULT Endpoint”, select “My development endpoint is a sub-domain of a domain that has a wildcard certificate from a certificate authority”.
Then click “Next”:
Now we can test!
Running our first test
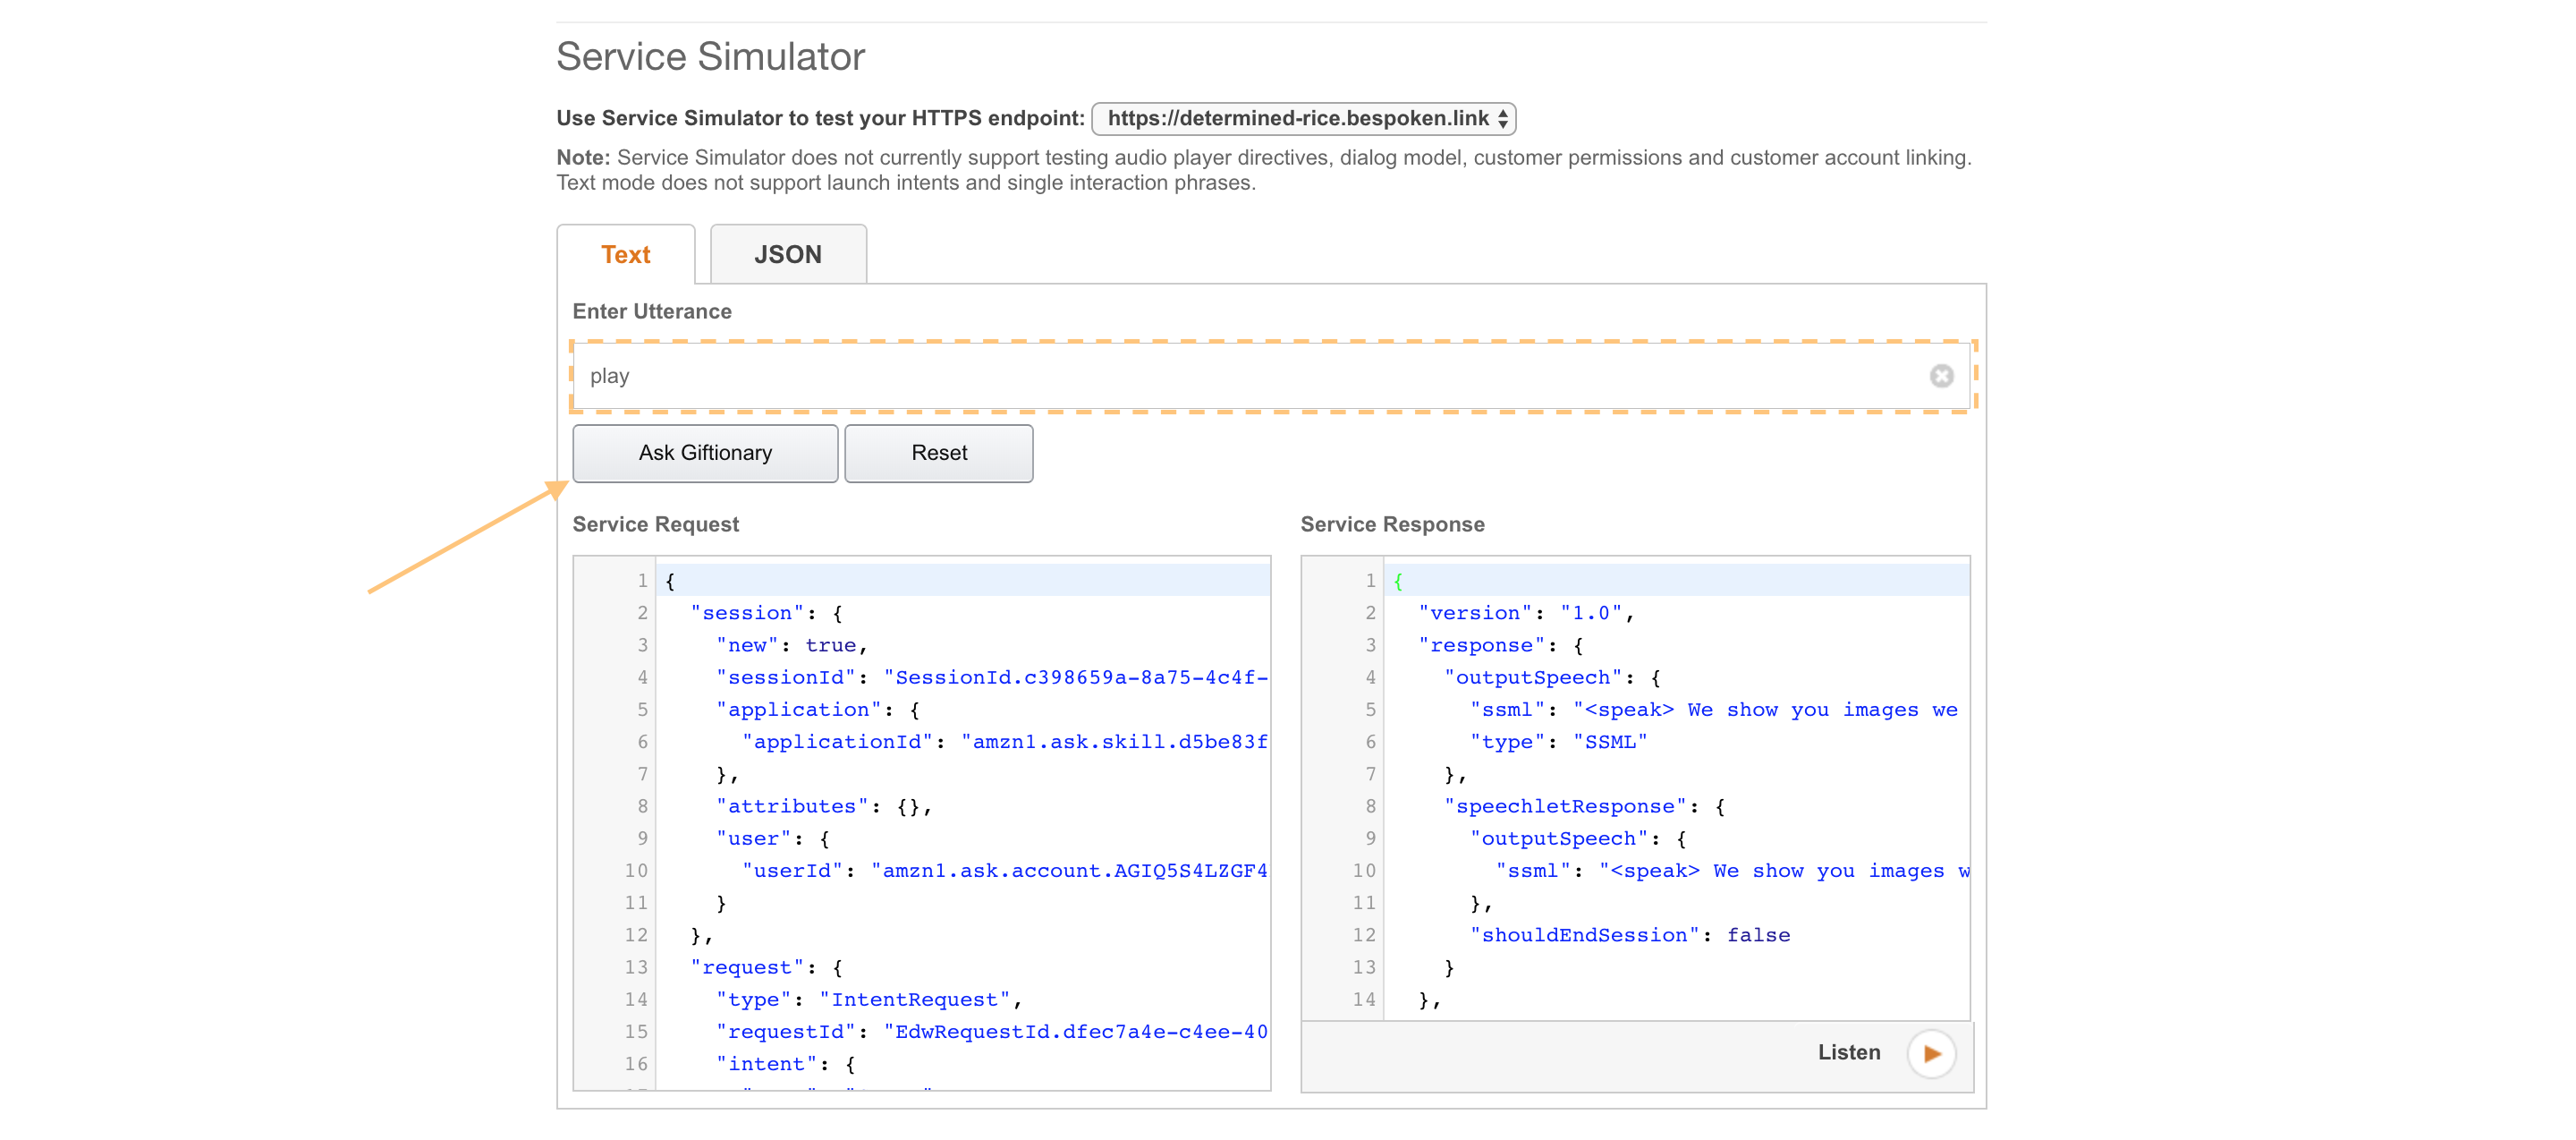
We’re going to start with a test that uses the Service Simulator. Type “play” in the “Enter Utterance” field and then click “Ask Giftionary”:
Now take a look at your console where sls proxy is running:
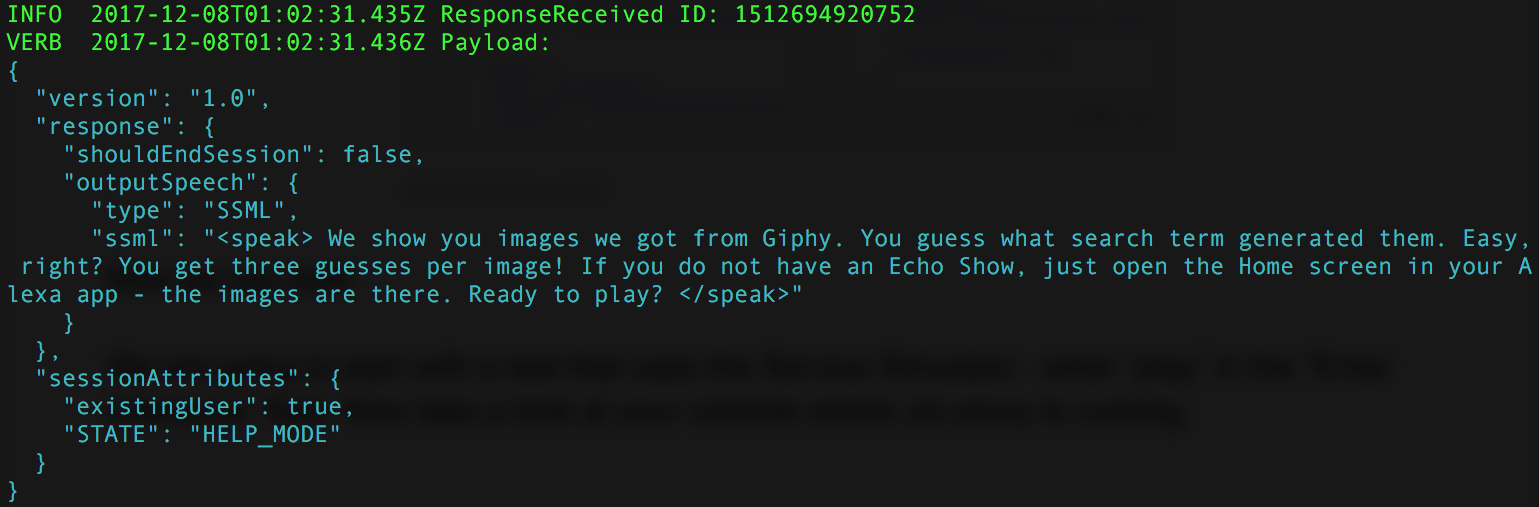
The same request and response from the “Service Simulator” is now in our terminal window. Neat, huh?
And we are not limited to testing via the Service Simulator. At this point, any Echo device can be used for testing. Tools like Echosim.io and the Reverb app will also work.
Now that we’re completely set up, let’s do a real deployment!
Deployment with Serverless
This step is easy; just open up your terminal and type sls deploy.
Once that completes, we’ll need to update our skill configuration. Remember, it’s still pointing at our testing URL. We want to point it to our new Lambda instead.
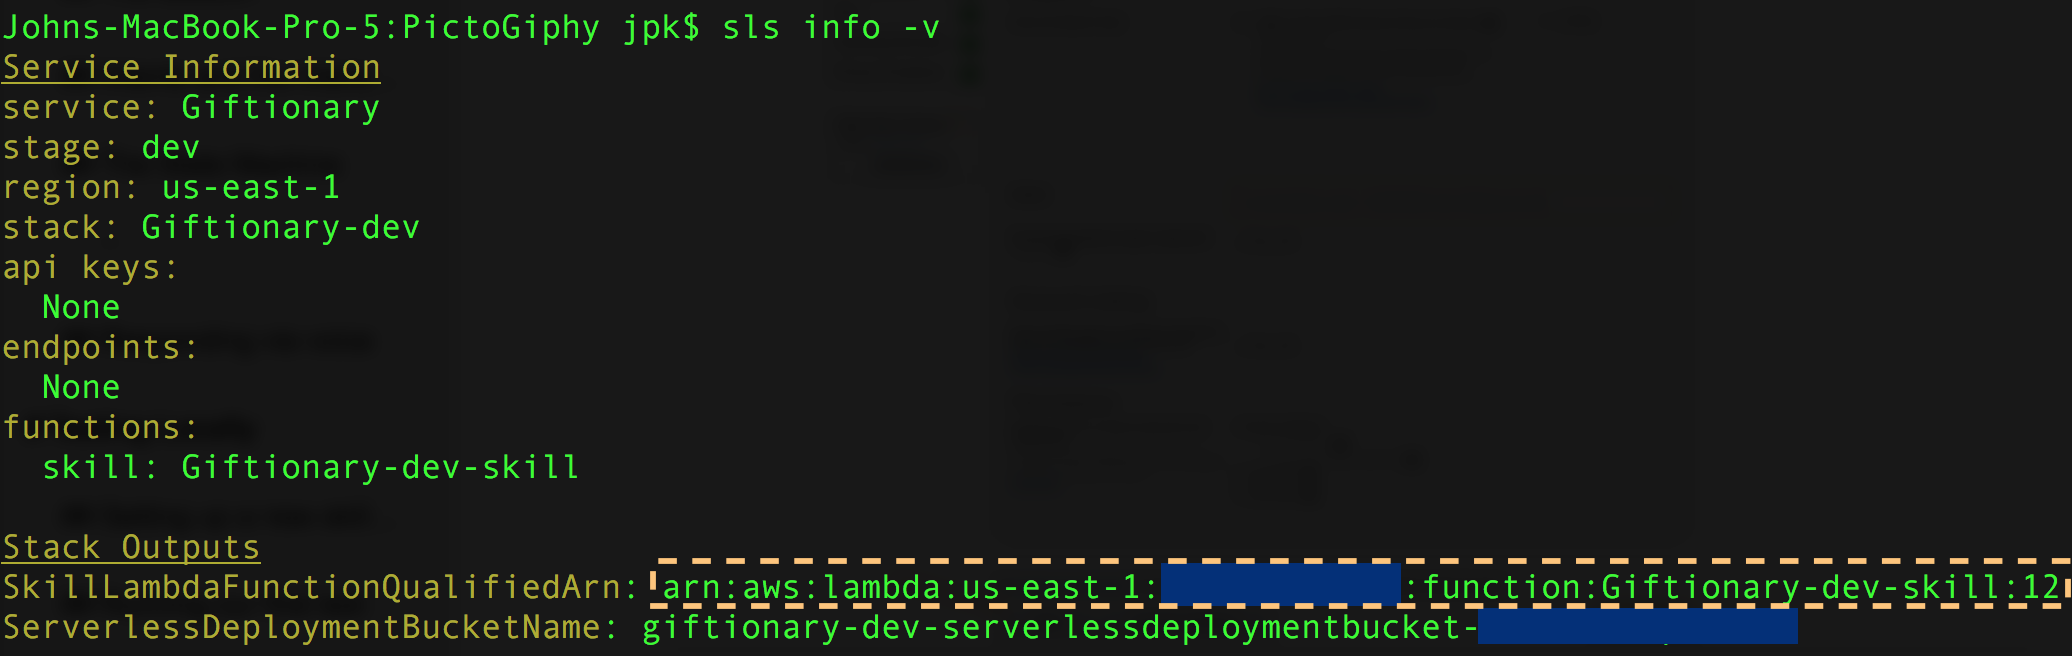
To update it, get your Lambda ARN—go to the command-line and enter sls info -v. You should see something like this:
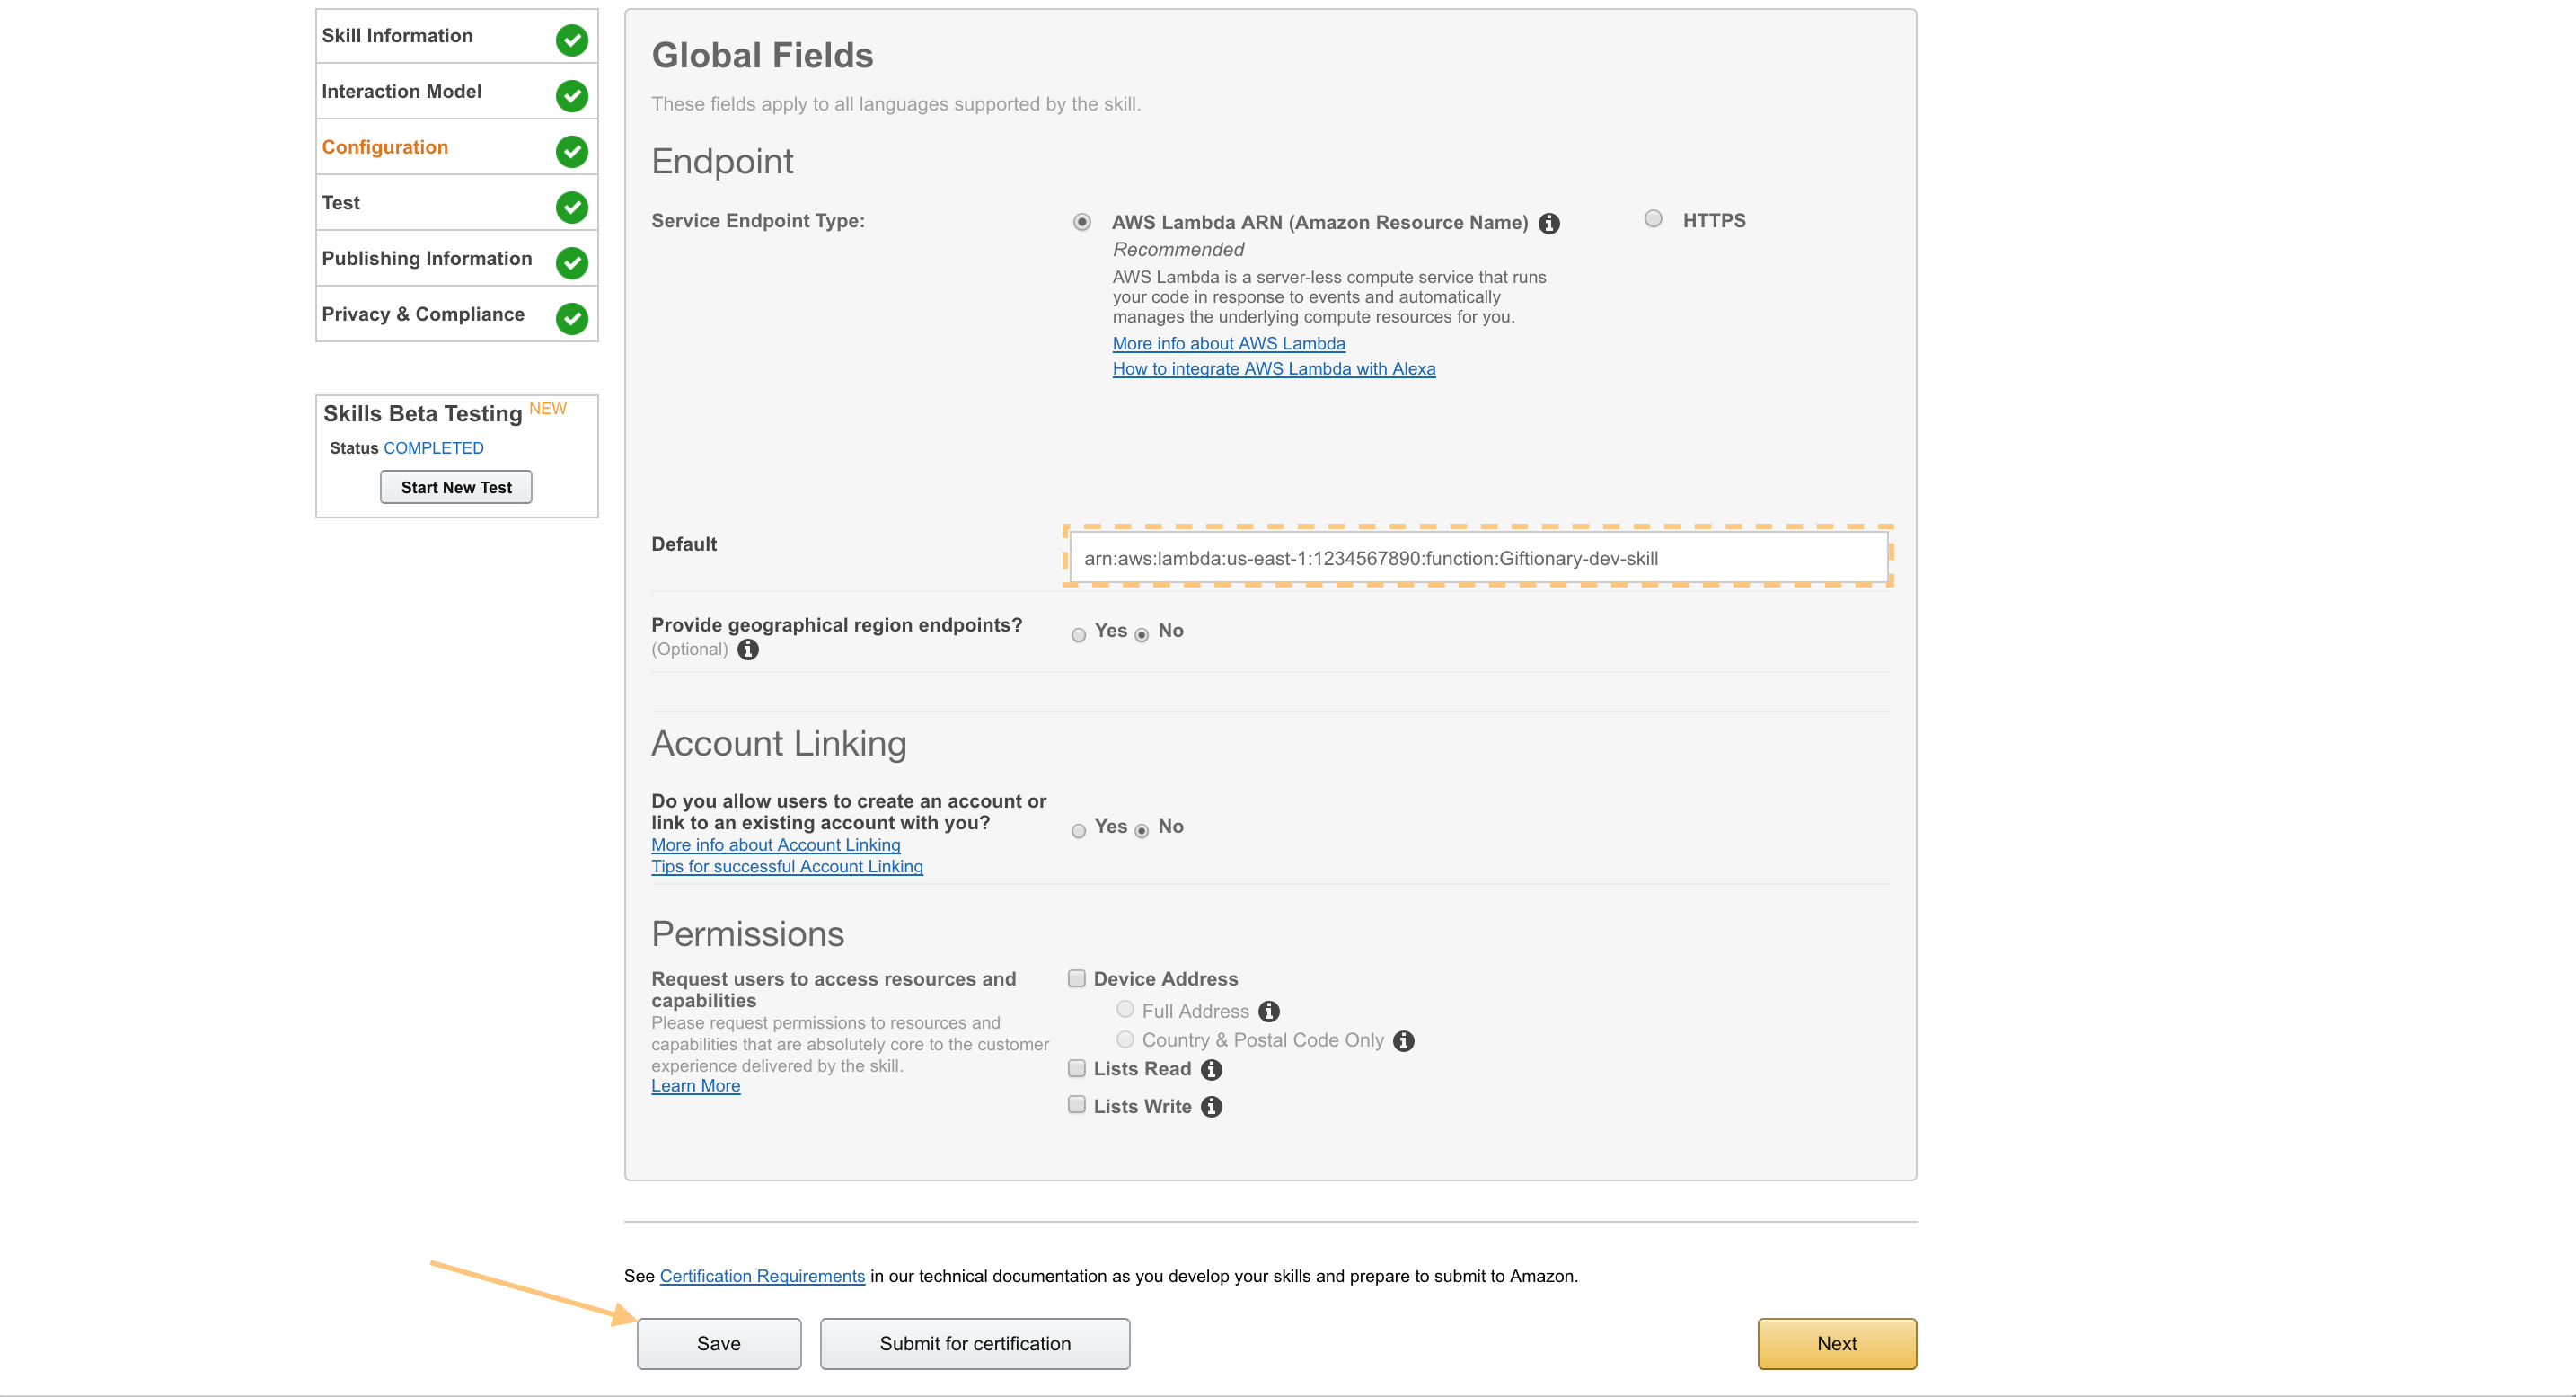
Copy the ARN and enter it on the configuration screen, then click “Save”, like so:
Now our skill is all set to be used by others!
Recap
- We’ve accomplished a lot here, so let’s do a quick review:
- We discussed the basic concepts behind how skills (and the Node.js SDK) work
- We set up our own first skill
- We tested it locally on our machine
- We configured it in the skill development console
- We deployed the AWS Lambda using Serverless
Further reading
From here, there are lots of areas to explore further:
- Set up “Skill Beta Testing”
- Publish the Skill so the world can use it
- Integrate longform audio or video into your skill
- Integrate display capabilities for devices such as the Echo Show
I'm John from Bespoken, so feel free to reach out if you have any questions.
Happy skill development!


